Utilizing Media Framework Tools
It is possible to utilize Unreal Engine 5.3 Media Framework tools for various tasks, such as playing a video file inside your Level through Reality Hub.
Before You Begin
Unreal Engine Documentation Link
- Check out the Unreal Engine 5.3 Documentation Page using the link above and get your scene ready accordingly.
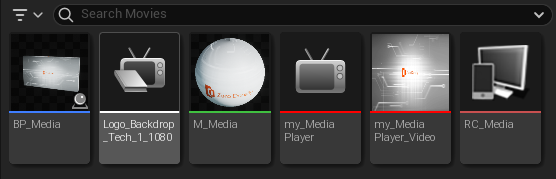
To use Media Framework tools with a basic pipeline, your Level needs to have the content outlined in the picture above:
- Media File Source
- Material
- Media Player
- Media Texture
- Remote Control Preset
Creating Blueprint

- Right-click on the Content Browser and select the Blueprint Class.
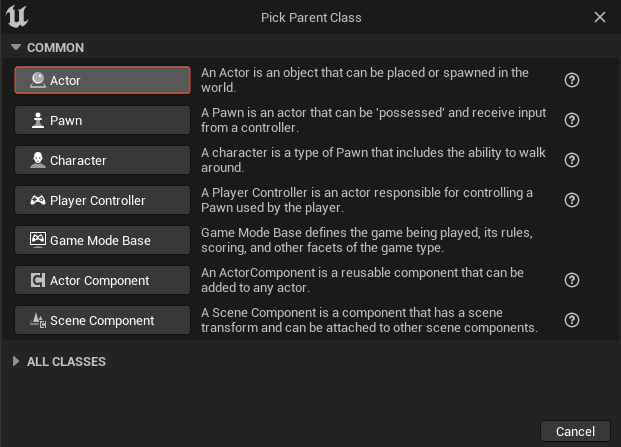
- Pick the Actor from the "Pick Parent Class" window, and give it a new name for better organization (in this case, we'll call it BP_Media)
- Drag & drop the blueprint into the Level.
- Double-click on the blueprint or right-click on it and select Edit.
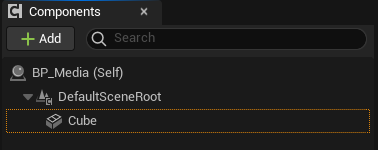
- Go to the Components section, click on Add button, find and select Cube.
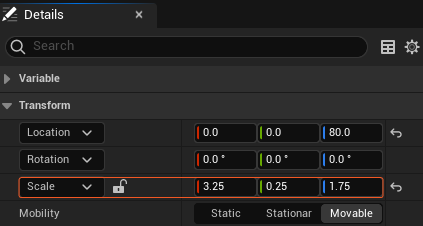
- Adjust the Scale parameter value of the Cube component as seen in the image above.
Defining Variables
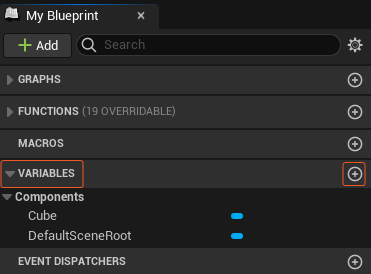
- Navigate to the My Blueprint section and click the Plus button to add your first Variable. If you want, you can rename it to MediaPlayer for better organization of your scene.
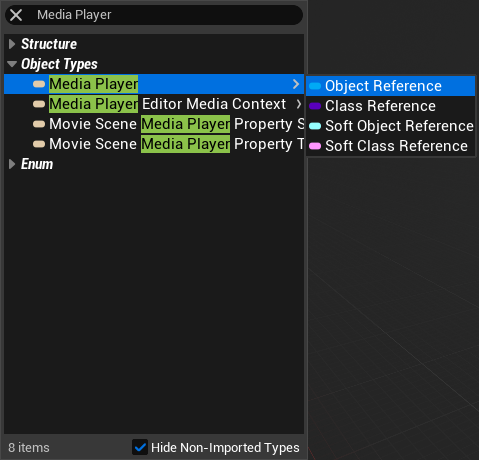
- Change the Variable type to Media Player > Object Reference, as shown in the image above.
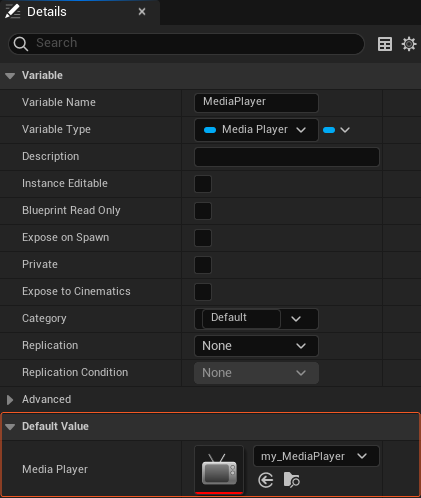
- Go to the Details panel, select your MediaPlayer as a Default Value, as illustrated above.
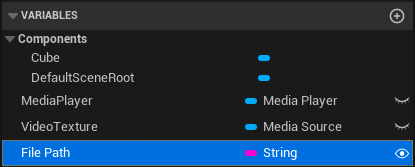
- Add another Variable, and change its type to Media Source > Object Reference.
- Rename it as VideoTexture, and leave its Default Value empty.
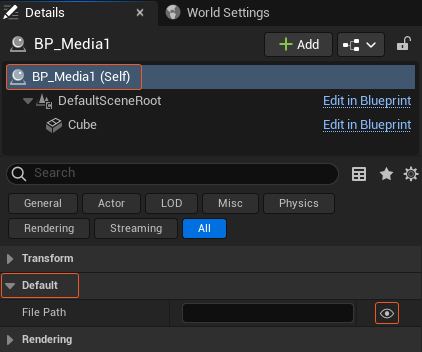
- Add another Variable, change its type to String, rename it something like File Path, and make it Instance Editable by clicking on the eye icon as illustrated above.

- Create the node tree as shown above.
Creating Material

- Right-click on the Content Browser and select the Material asset, rename it something like M_Media.
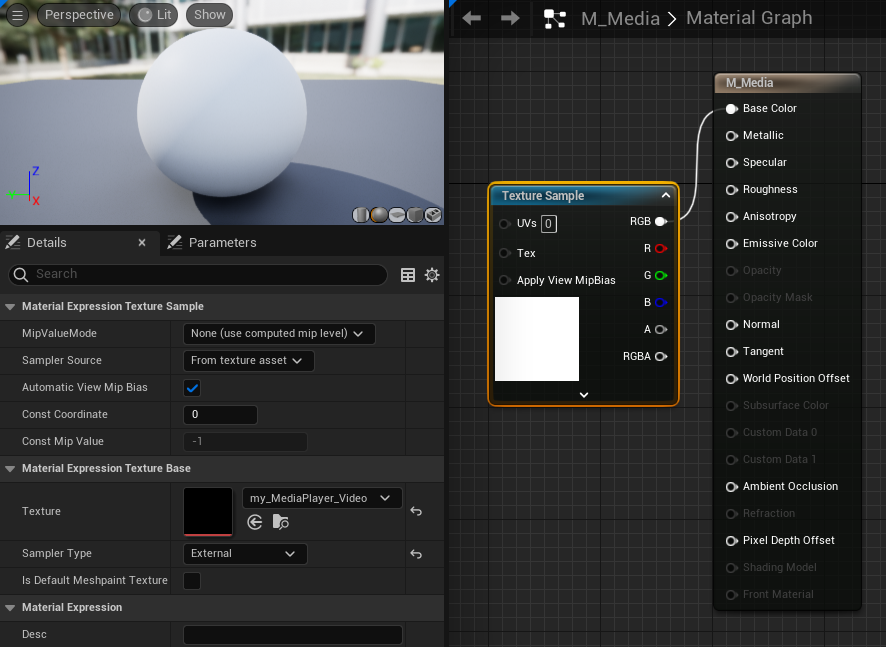
- Drag & drop your Media Texture asset (in our case, it is my_MediaPlayer_Video) to the Material Editor.
- Connect the RGB output of the Texture Sample to the Base Color input of the Material, and Save it as shown above.
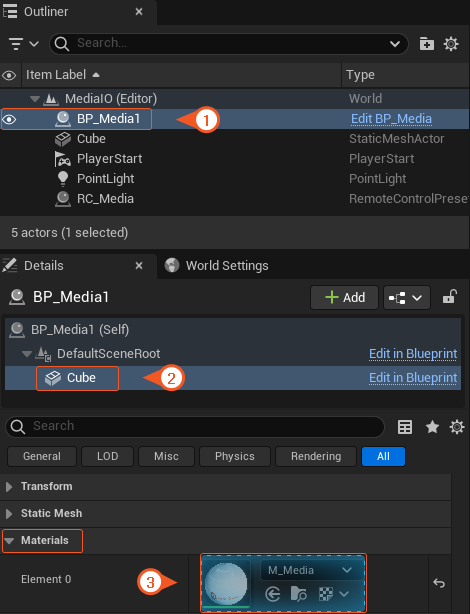
- Go to Outliner and select your Blueprint.
- Select the Cube asset in the Details panel.
- Go to the Materials property group and assign the material to the Element 0 slot.
Preparing Remote Control Preset
- Right-click on the Content Browser.
- Go to Remote Control and select the Remote Control Preset (RCP).
- Double-click on the RCP and keep it open.
- Go to the Details panel, select the Blueprint.
- Expose the File Path property by clicking on the eye icon, as shown above.
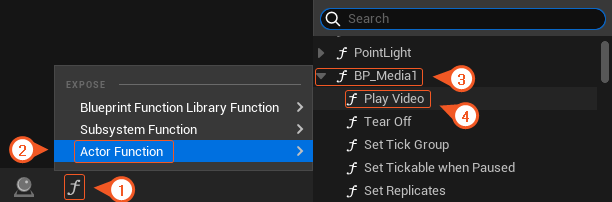
- Click on the Expose Function button.
- Go to Actor Function > Blueprint > select the Play Video.
- Save the RCP and then drag and drop it into the Level.

Your RCP should look like in the image above.

- Change the exposed property's name to something like Video for better organizing.
- Add the following suffix after the exposed property's name:
_FilePath_AssetPathas illustrated above. - Save the RCP, then Go to File > Save All.
- Close the Unreal Editor.
- Switch to Reality Hub and Launch the Project via Launcher Module.


- Image 1 shows the exposed property as a FileInput component inside the Reality Hub.
- Image 2 shows the exposed Blueprint Function as a button.
Now you can select a video through Asset Browser and utilize it through Reality Hub modules such as Actions, Form Builder, and Playout.