Computer Mount
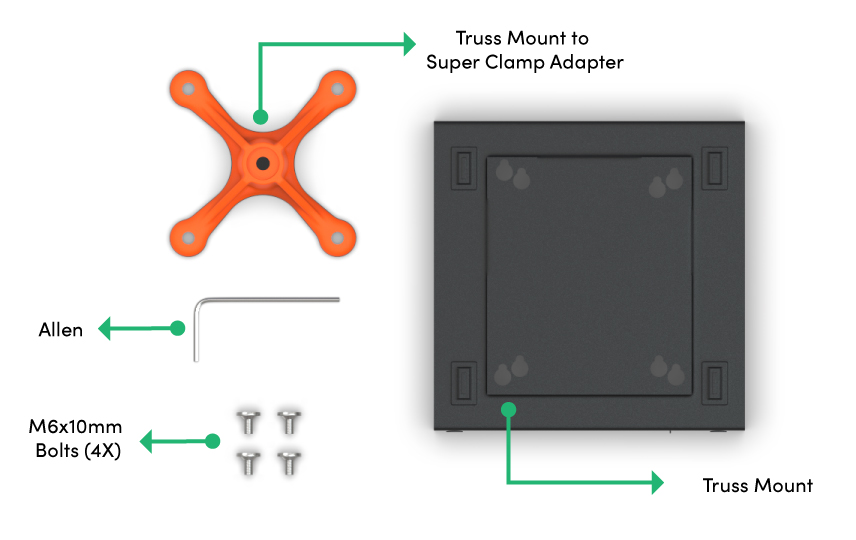
Prepare the following part as shown in Image 1:
- Truss Mount
- Truss Mount to Super Clamp Adapter
- Allen
- M6x10mm Bolt (4x)
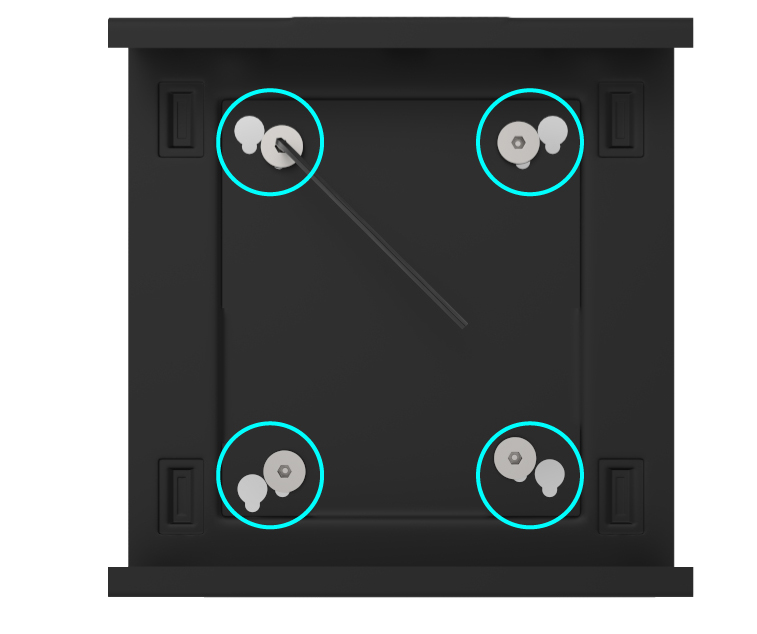
Follow the instructions:
- Flip the Truss Mount while holding the Truss Mount to Super Clamp Adapter in its position
- Screw down the M6x10mm Bolts (4x), as shown in Image 2
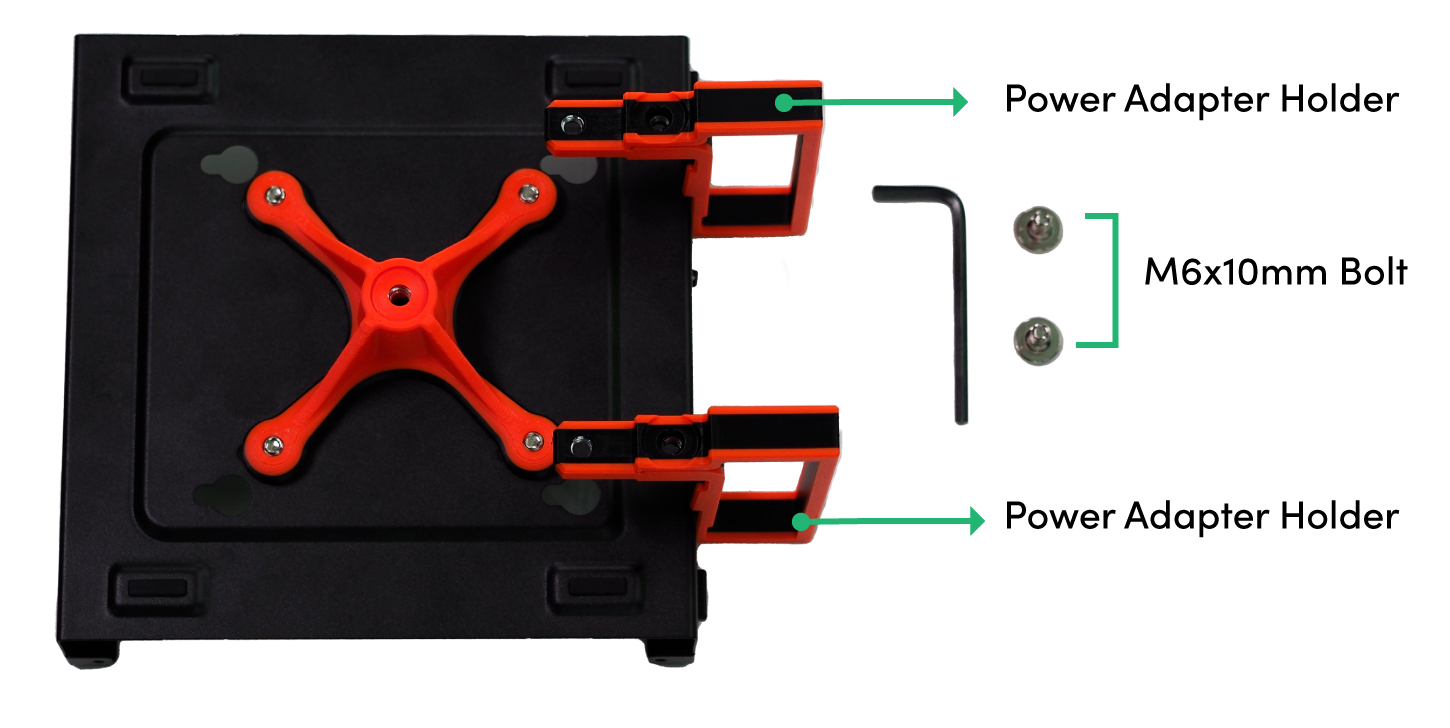
Prepare the following parts as shown in Image 3:
- Power Adapter Holder (2x)
- M6x10mm Bolt (2x)

- Flip the Truss Mount while holding the Power Adapter Holder in its position
- Screw down the M6x10mm Bolts (2x) as shown in Image 4
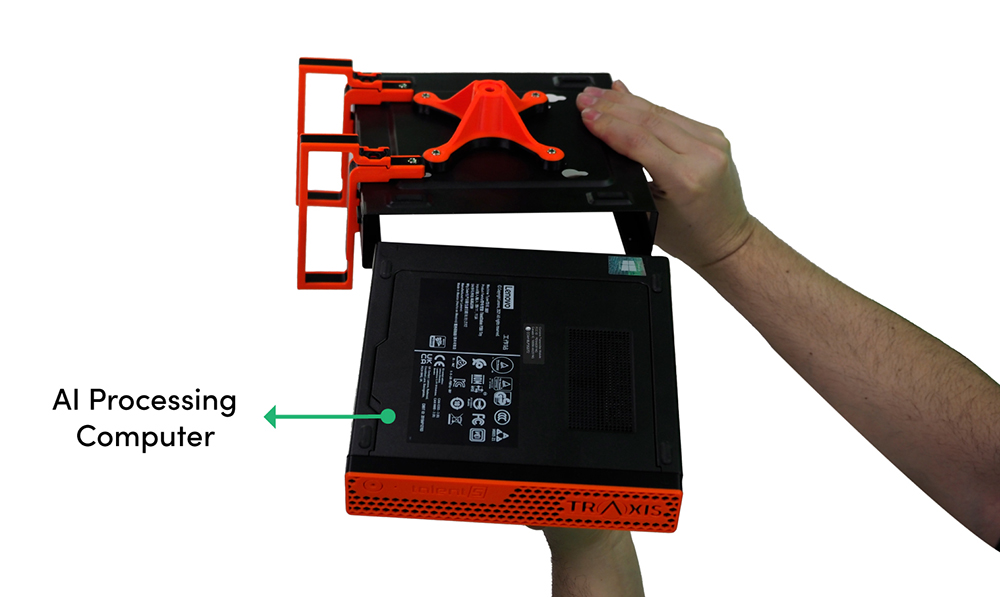
- Interlock the Truss Mount and AI Processing Computer, as shown in Image 5.
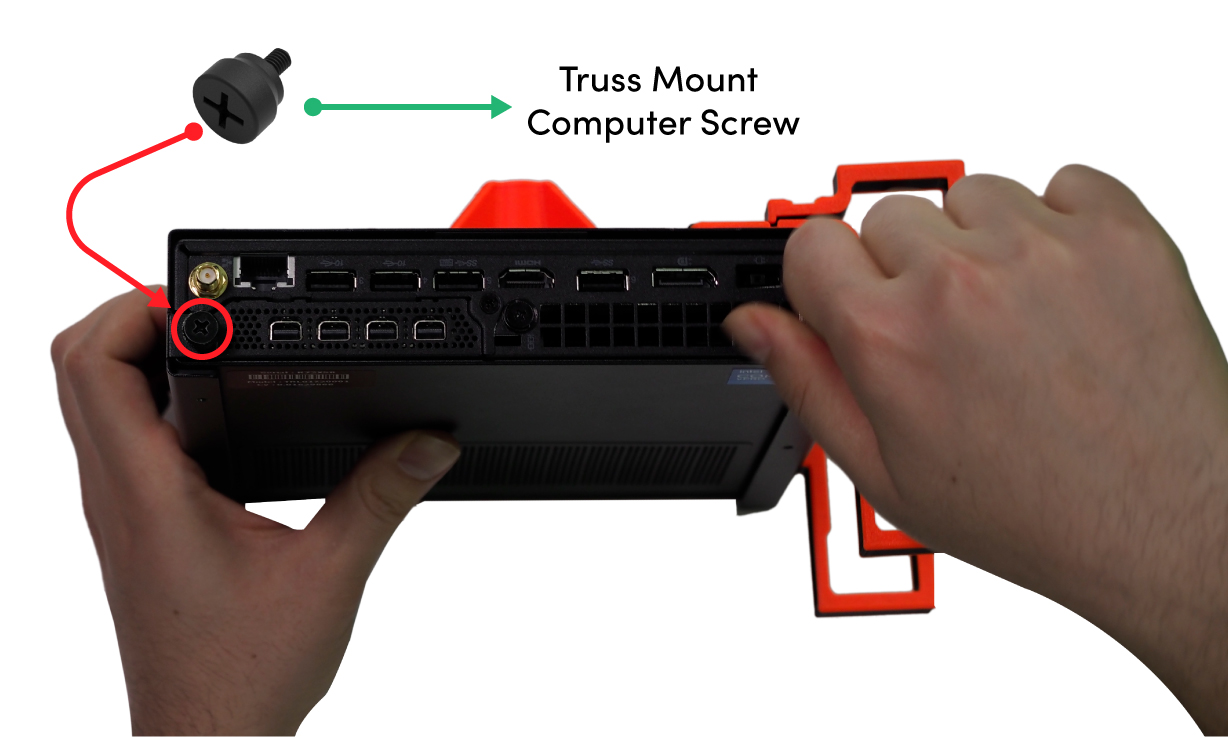
- Screw down the Truss Mount Computer Screws (2x), as shown in Image 6

- Insert the Power Adaptor into Power Adapter Holders, as shown in Image 7.
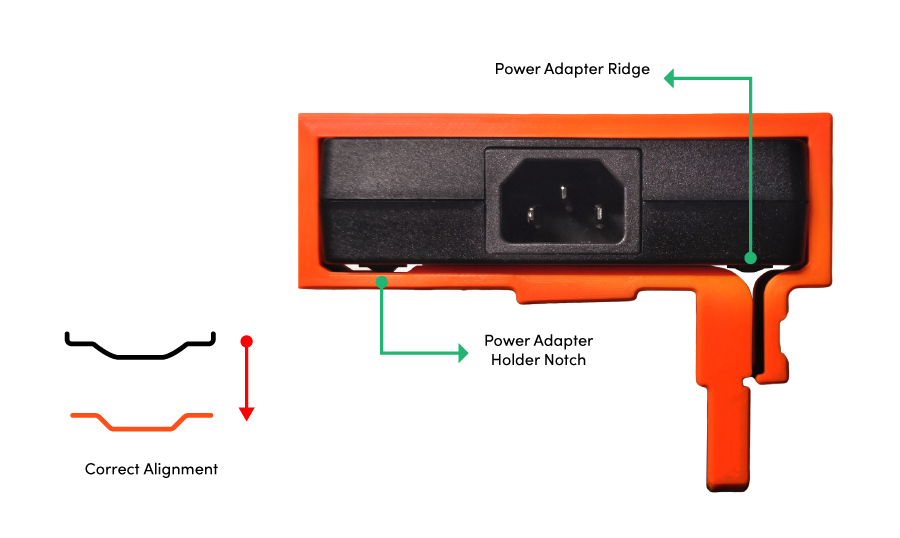
- Follow the correct alignment by taking the ridges and notches into consideration, as illustrated in Image 8.
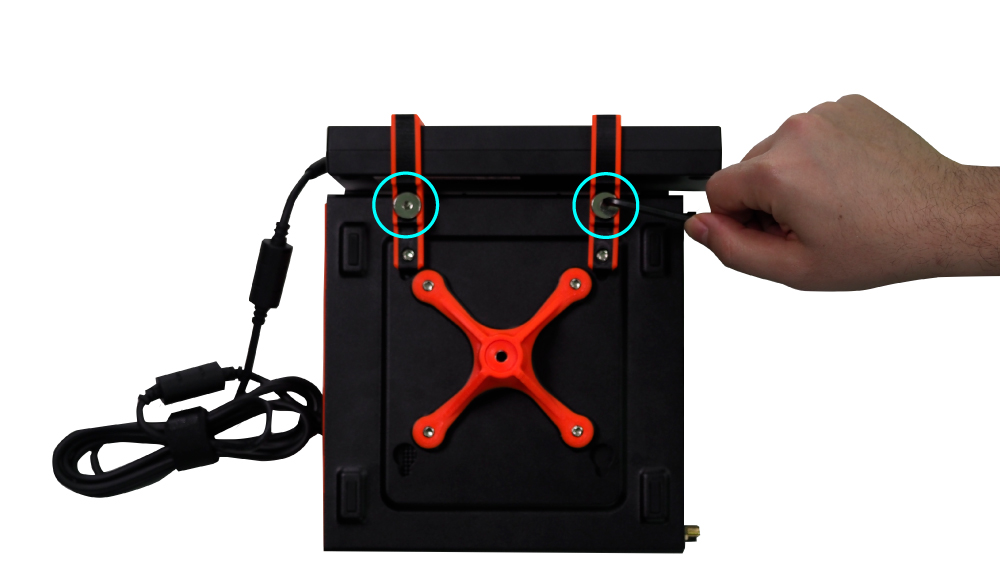
- Screw down the M6x10mm Bolts (2x) to Power Adapter Holders, as shown in Image 9.

- Insert the Lighting Stud into Manfrotto Super Clamp as shown in Image 10.
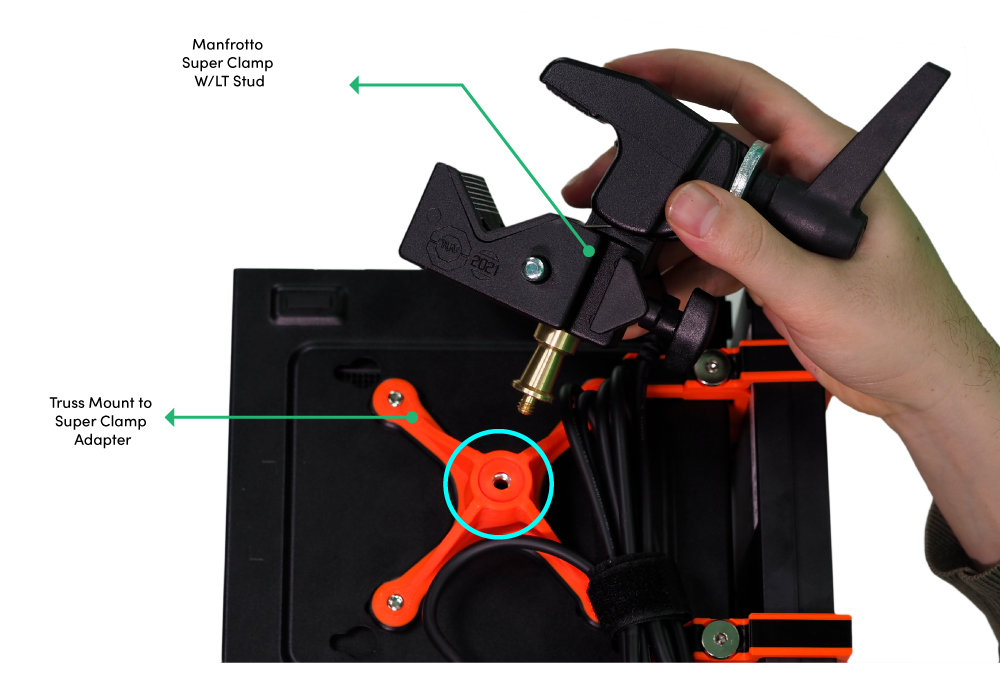
- Screw down the Manfrotto Super Clamp W/LT Stud to Super Clamp Adaptor, as shown in Image 11.
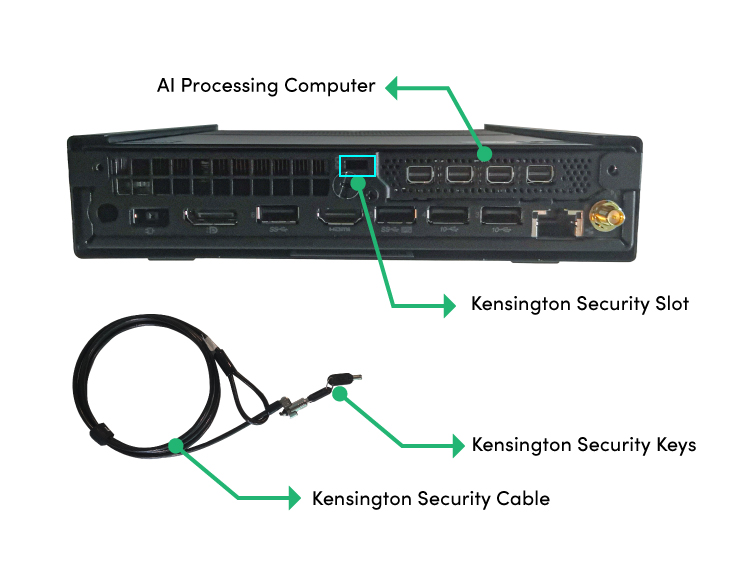
Prepare the following tools as shown in Image 12:
- Kensington Security Cable & Keys
- AI Processing Computer
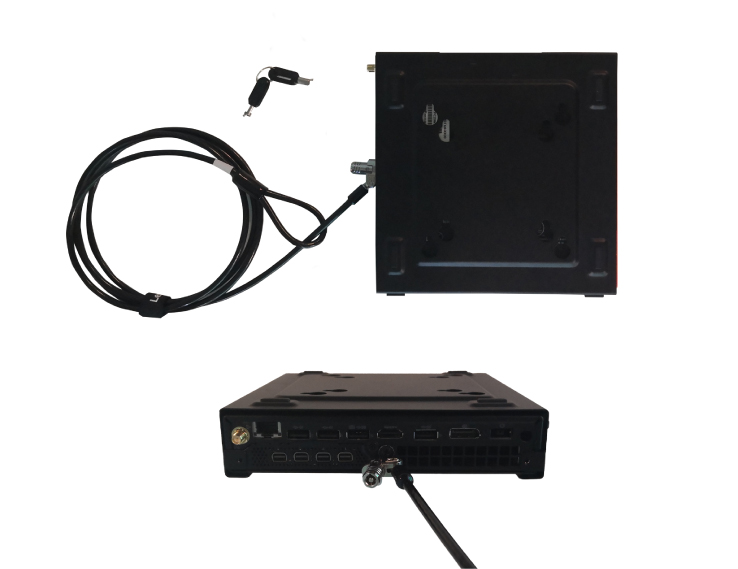
- Insert the Kensington Lock into the Kensington Security Slot, as shown in Image 13.