Rack Mounting
When you receive your EVO II shipment, same box contains rack mounting, rail kit, and additional screws.
Separating Sliding Rails

- Extend the center slide of each rail fully until it stops.
- Locate the locking clip at the end of the center slide.
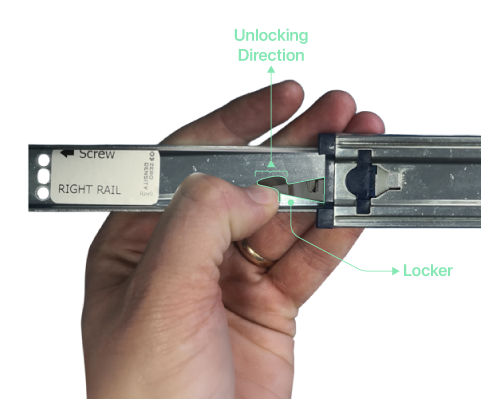
- Push the locking clip upward to release and remove the center slide from the main rail assembly.
Attaching Center Slides EVO II Chassis
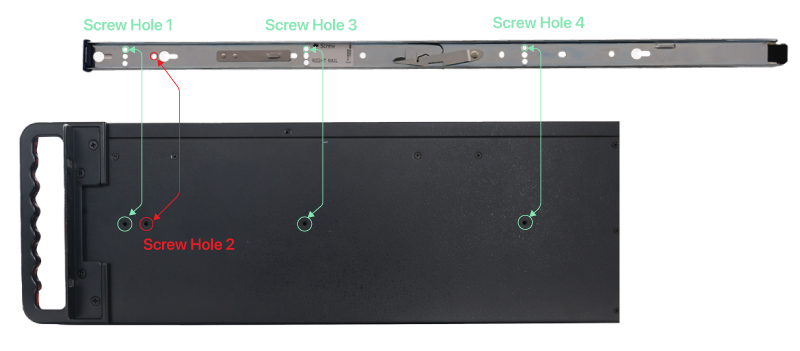
- Align the detached center slides with the mounting holes on each side of your rackmount chassis.
important
As illustrated above, you must skip the Screw Hole 2, otherwise assembly will not match.
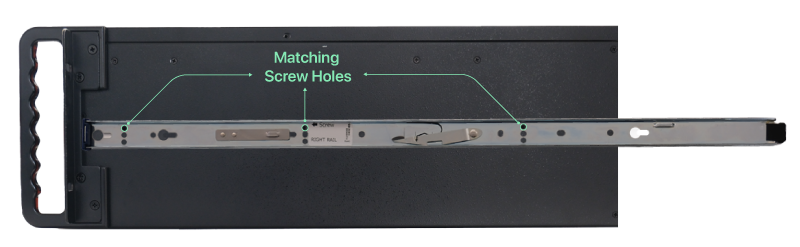
- Secure the center slides to the chassis using the provided M5 screws.
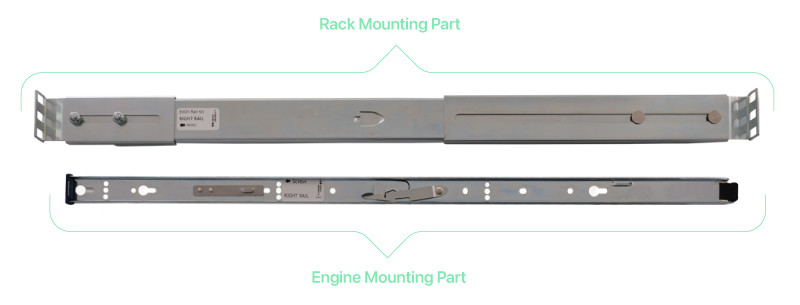
Installing Outer Rails to Rack
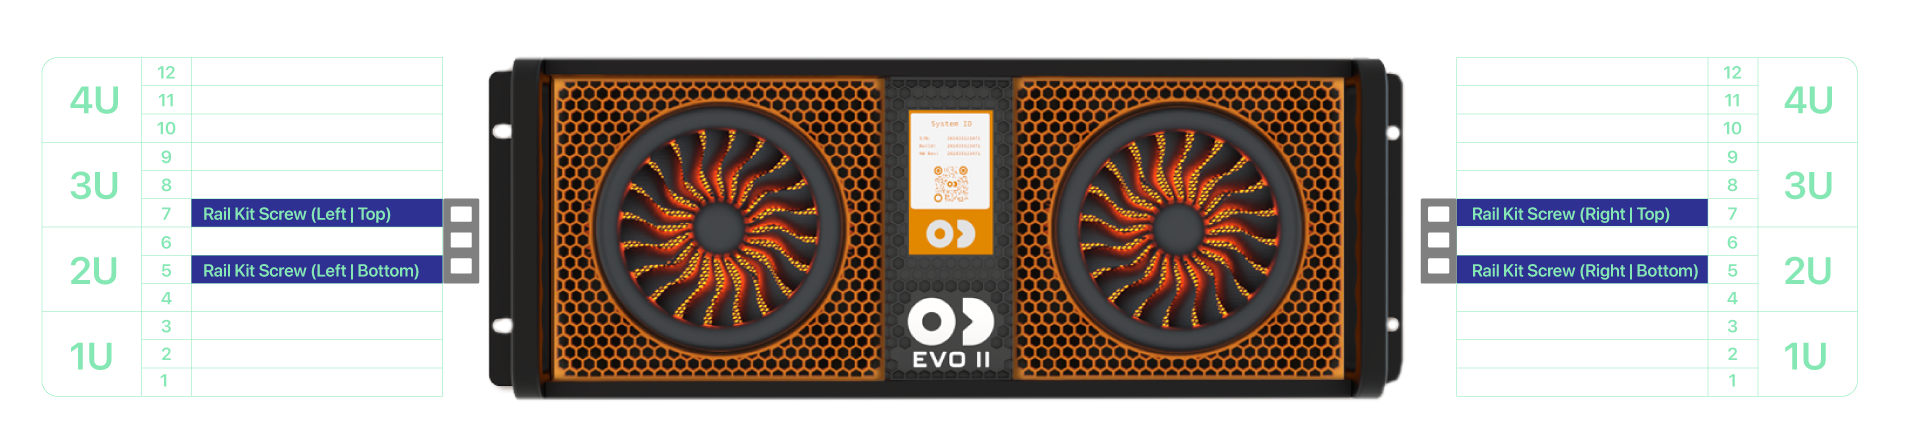
The EVO II has a 4U rack-mountable chassis with 24-inch rails. The image shows where to attach the Engine Mounting Part of the Rail Kit when installing it in your 4U rack.
- Align the outer rails with the installed L-shaped brackets on both sides of the rack.
- Secure the outer rails to the brackets using the appropriate screws.
- Ensure that the rails are parallel and securely fastened.
Inserting Chassis into Rack
- Carefully align the center slides (attached to the chassis) with the outer rails installed in the rack.
- Gently slide the chassis into the rack, ensuring smooth movement along the rails.
- Push the chassis all the way in until it locks into place.
Verifying Installation
- Pull the chassis out to its fully extended position to ensure it slides smoothly and is securely supported by the rails.
- Push the chassis back into the rack, confirming it locks securely in position.