Open/Close Door
In this tutorial, we will learn the basics of using function exposing. We will rotate the door using the Timeline component. This tutorial focuses on three topics:
- Using ZD Actor Component.
- Using Blueprint Events.
- Using timeline function on blueprints.
Getting Started
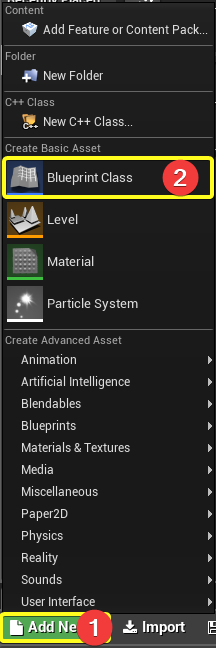
- Click on ADD NEW and then BLUEPRINT CLASS
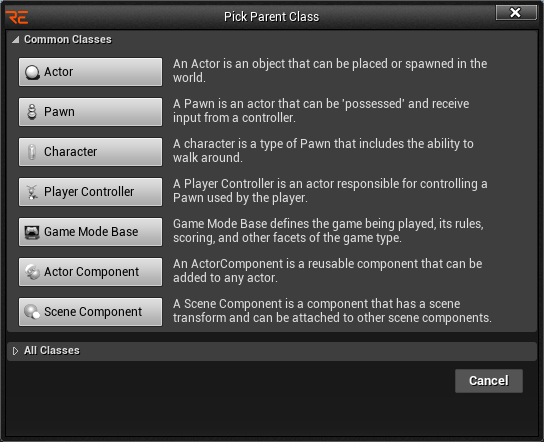
- Click Actor
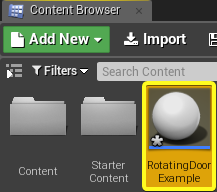
- Select actor on Content Browser. Rename it as RotatingDoorExample.
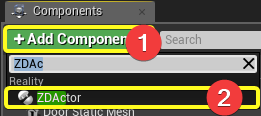
- Click ADD COMPONENET and in the search bar find and select the ZDACTOR
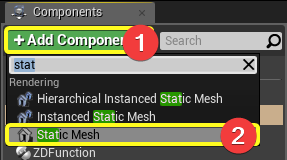
- Click ADD COMPONENT in the search bar find and select the STATIC MESH
- Rename Static Mesh Component as Door Static Mesh. On the Details Tab(right side of screen) click Static Mesh tab and select SM_Door as static mesh.

- Click Event Graph.
![]()
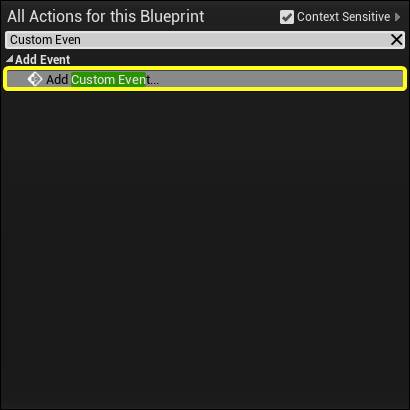
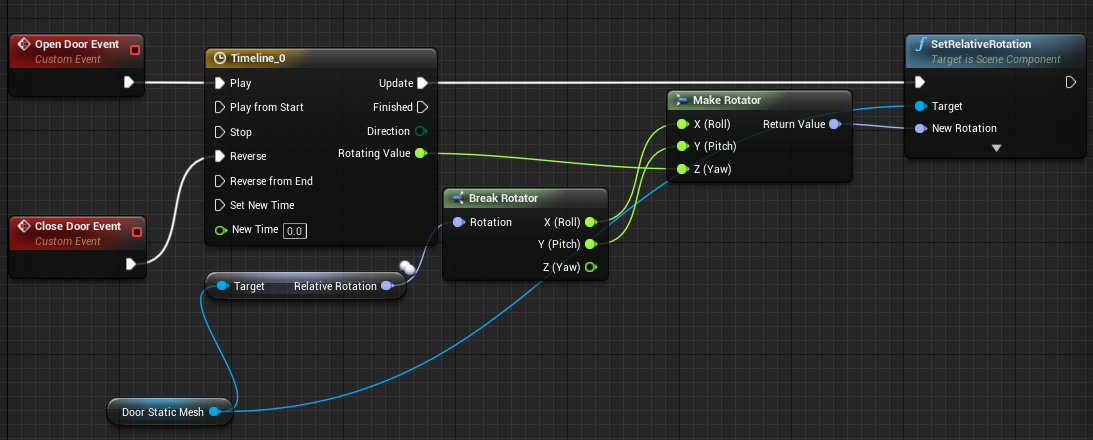
- On the Event Graph, right-click into space and search for "Custom Event" and click Add Custom Event.
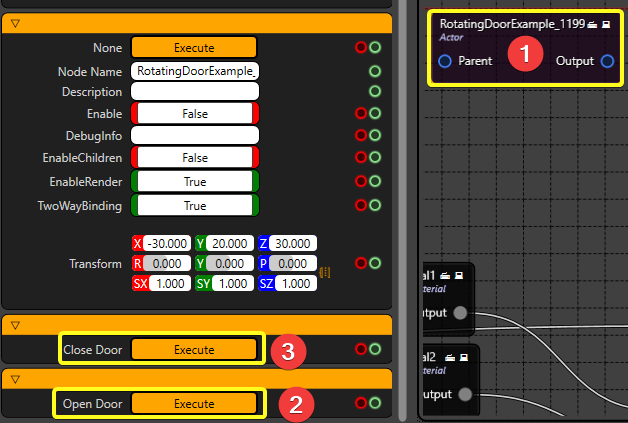
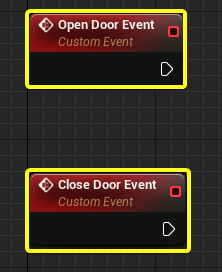
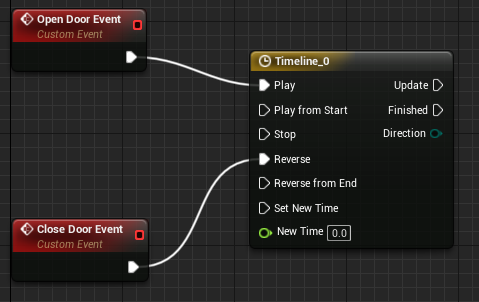
- Create two Custom Event. Rename these as Open Door Event and Close Door Event.
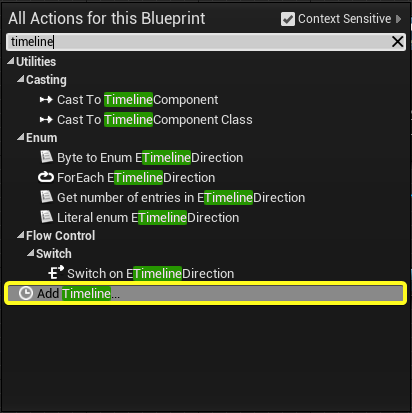
- Right click into space and search for “Timeline” and click to Add Timeline.
- Connect the events shown as below. After connect the pins, Double Click on Timeline_0.
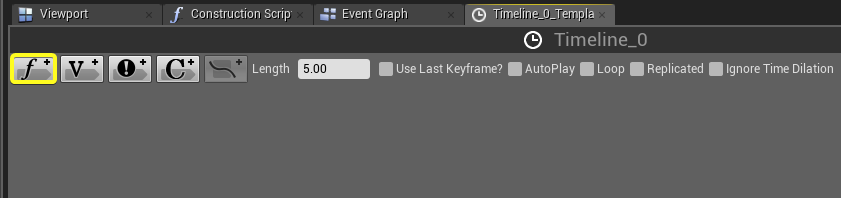
- In the timeline click on Add Float Track.
- After click on button, rename it as Rotating Value.
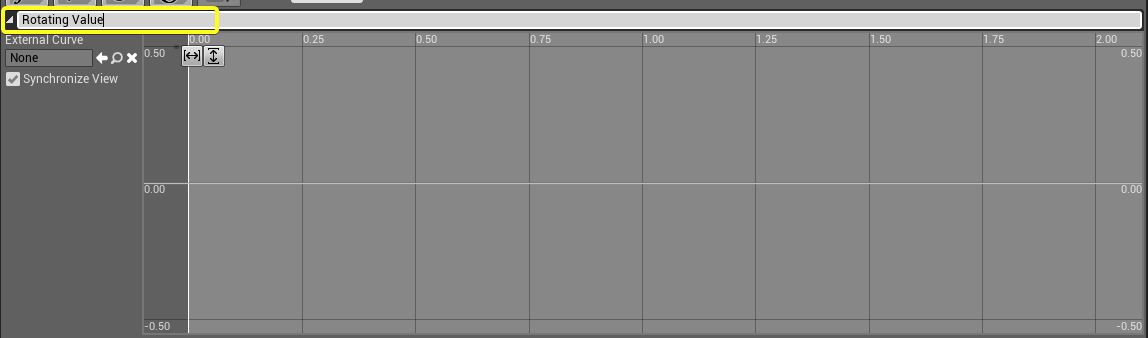
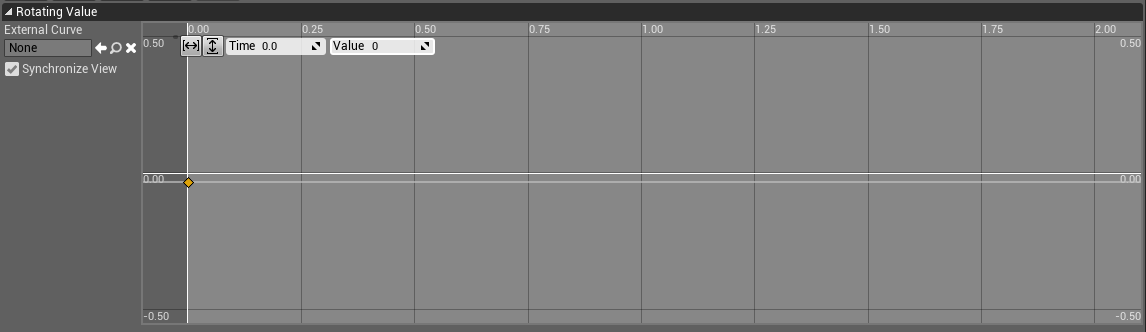
- Right click on the space Add Key to CurveFloat.
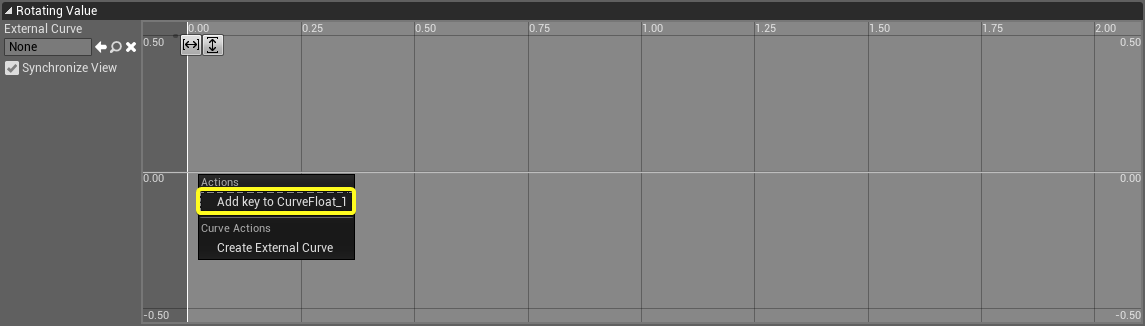
- Set Time and Value to 0.
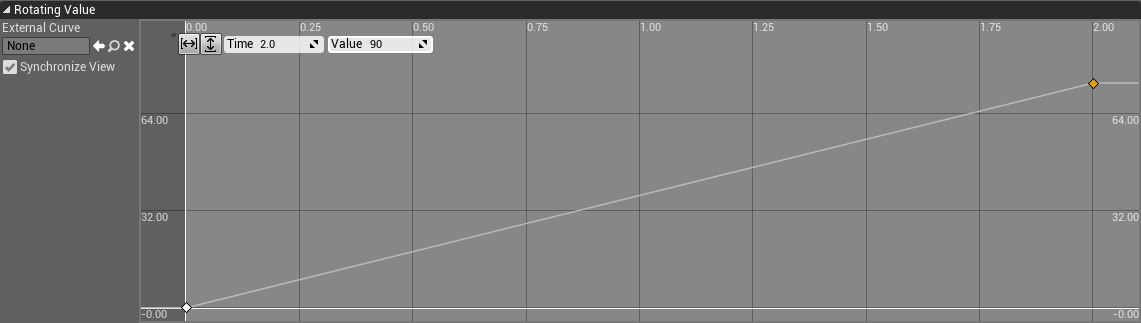
- Right Click onto space, and Click Add key to CurveFloat_1.
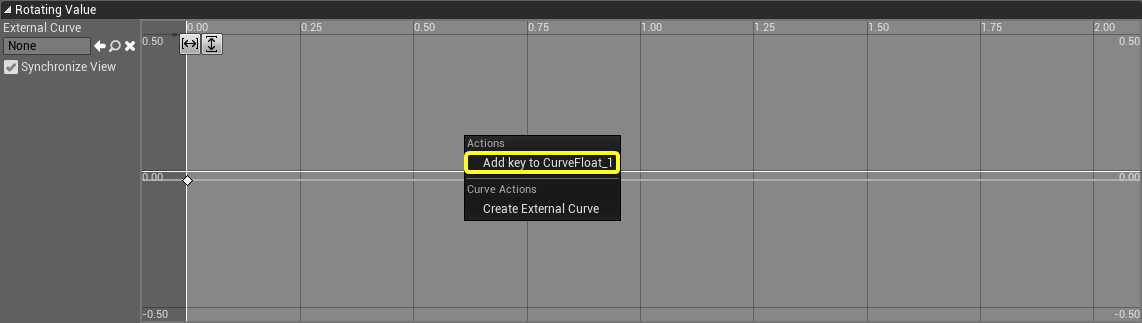
- Set Time to 2 and Value to 90.
- Click On EventGraph and connect the nodes as shown in below.
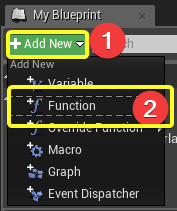
- Click on ADD NEW and then select the FUNCTION
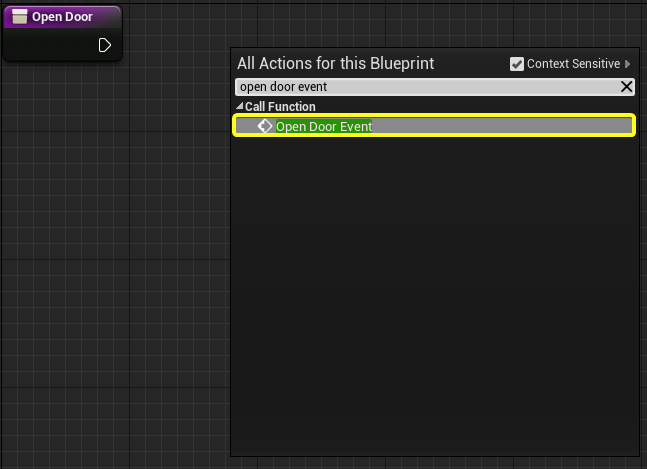
- Rename the function as OpenDoor. Right Click on space and search for Open Door Event.
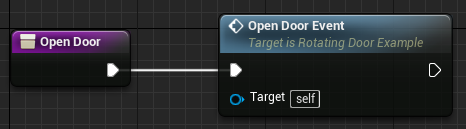
- Connect the nodes shown as in below.
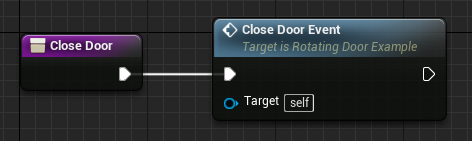
- Create another function. Rename as Close Door. Call Close Door Event.
- Click COMPILE and then SAVE. Close the blueprint.

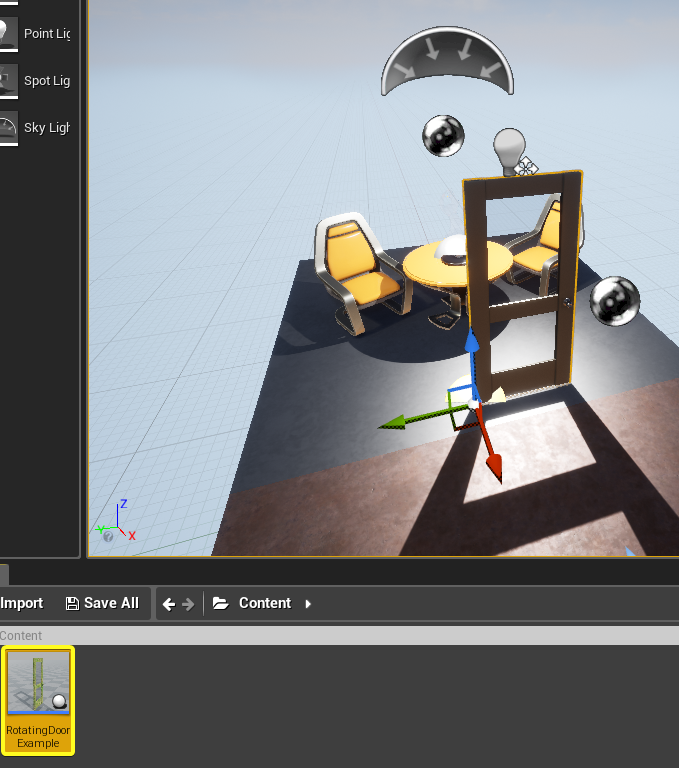
- Move RotatingDoorExample into the level.
- Launch Reality Setup. Click Play on Reality Editor.

- Click RotatingDoorExample on Reality Setup graph. Click Open Door and Click Close Door. Investigate the level.