Custom Projection Mesh Pipeline
In the following example we utilized an empty scene, but it is applicable to your already existing scene.
Preparations
Before you begin the process of defining a Custom Projection Mesh, several steps must be accomplished when creating and exporting your mesh from your conventional 3D design application, such as Blender or Autodesk Maya:
- Create your 3D mesh based on your studio requirements and measurements and ensure that the mesh does not have existing seams.
- Export the 3D mesh in FBX file format and place it into your project folder.
Optionally, you can reverse the vertex normals to orient them inward and create seamless UV map for better debugging.
Process
- Click on the ProjectionMesh link, and place the uasset file into your project folder.
- Open you project file with Reality Editor.
- Navigate to ProjectionMesh blueprint.
- Double-click on the blueprint and switch to the Blueprint Editor.
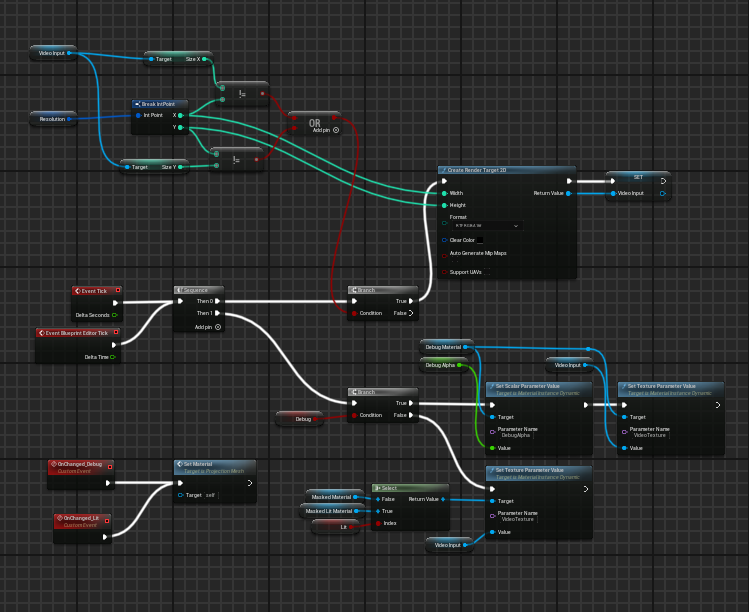
Your event graph should look like in the image above.

- Select the Mesh from the Components.
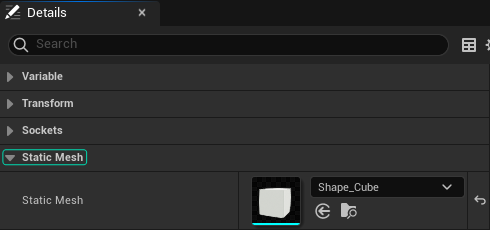
- Go to Details panel, assign your custom Projection Mesh.

- Disable the Cast Shadow option, as illustrated above.

- Enable the Render In Video Mask Pass option, as shown above.
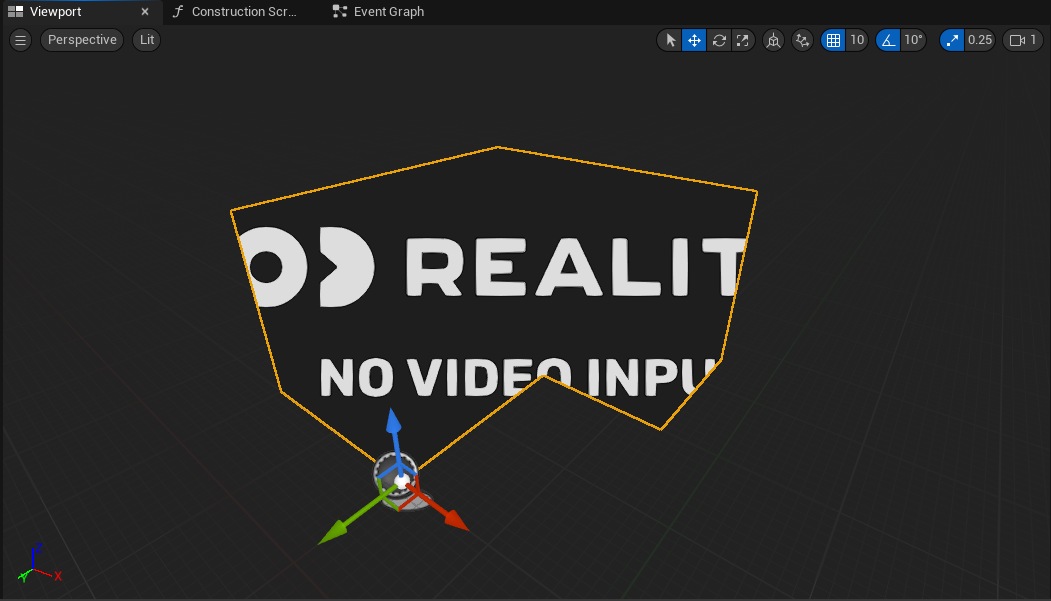
- Your Blueprint Viewport must look like in the image above.
- Compile and then Save the blueprint.
- Save your scene.
- Switch to Reality Hub.
- Launch the project you saved from the Launcher module.
- Navigate to the Node Details Panel.
- Drag and drop the
UE5node into the canvas. - Go to the Properties panel while the
UE5node is selected. - Expand the
Controland thenSpawn Actorproperty groups.
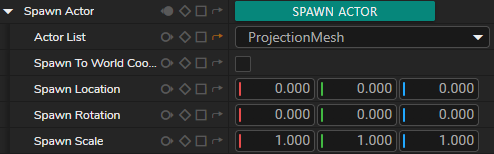
- Navigate to
Actor List, find the ProjectionMesh and click on the Spawn Actor button.
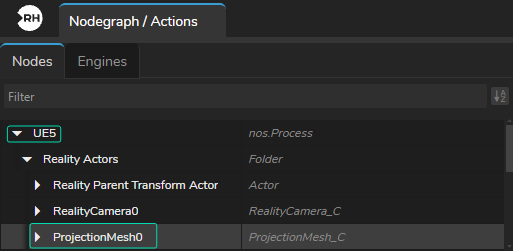
- Select the
UE5processing node from the nodegraph canvas. - Expand UE5 group and select the ProjectionMesh group, as shown above.
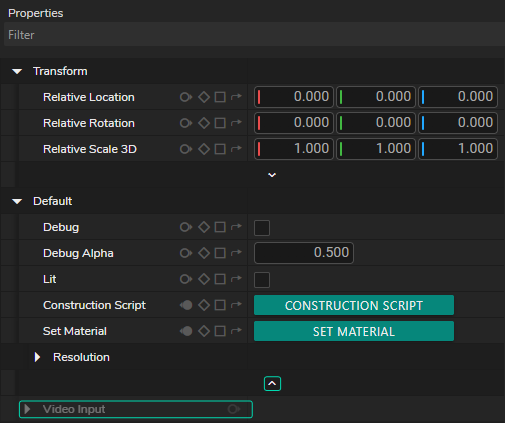
- Navigate to the Properties panel.
- Expand the
Defaultproperty group and then expand its advanced property, as illustrated above. - Right click on the
Video Inputproperty and select Show as Input from the node property context menu.
ProjectionMesh is ready as an input pin, as shown on the image above.

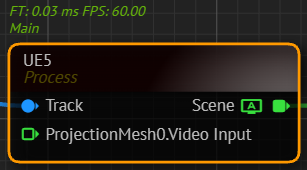
- Connect your video source to the
ProjectionMesh.Videoinput pin.
As the above image shows, the custom 3D mesh we included to our scene is now ready as custom projection mesh.
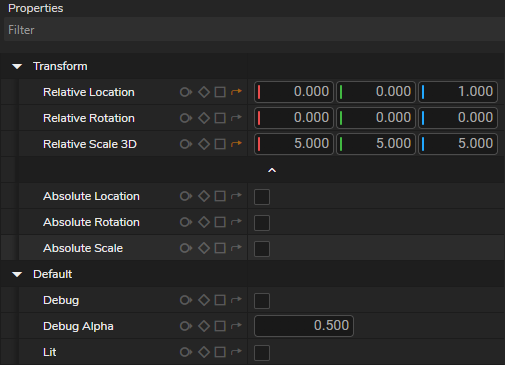
You are able to change transform properties of the Custom Projection Mesh along with the unique settings such as enabling Debug and Lit.