Animation Workflow Tips
Properties, Functions, and Function Parameters are subject to the Action module and can be animated/triggered/called through various methods as such:
- Adding Keyframe First Approach
- Get Value Approach
If you create a New Action, Property Timeline Indicator will disappear because of its association with your previous Action.
A property/function can be animated independently in different Actions.
Adding Keyframes First Approach
Before you begin, it is crucial to know that if you adjust the value through the Node Details Panel module, you must use the Get Value option inside the Actions; otherwise, the new property value will not be registered.
This approach consists of two basic steps: adding the keyframe and then adjusting the value. To set an example, let's assume that you want to move a Camera from Point A to Point B, then Point C.
To do that:

- Add the first keyframe to a property you want to animate
- Scrub the Playhead to a different frame, add another keyframe and then change the value
- Repeat the same process for the third keyframe.
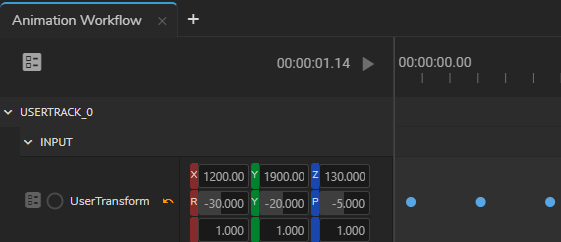
The keyframes are ready. We first added the keyframe to the timeline in the example above and changed (registered) its value.
The image above suggests that in their current status, keyframes have no defined interpolation, and the animation type will be Jump; in other words, the movement of the Camera will occur instantly.
Get Value Approach
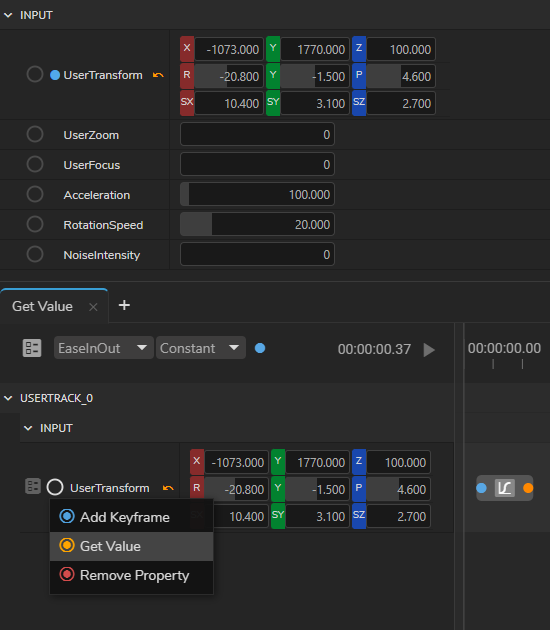
To modify a property value in the Action timeline using the Properties/Function module, you must use the Get Value function to register the modified value to the keyframe.
Get Value is a handy tool if used with the GamePad feature harmoniously.
To utilize the Get Value approach:

- Add the first keyframe to a property you want to animate.
- Scrub the Playhead to a different frame.
- Deselect the first keyframe.
- Change the value via Properties/Functions module.
- Go to the Actions module.
- Right-click on the Node Property Menu Circle.
- Select the Get Value, right-click again and select the Add Keyframe.
Multiple Keyframe Animations
Note that the default state of animation in the Action module is set to Jump, so this method differs from the way it is done in other applications.
To animate a property/function with more than two keyframes using interpolation in the Action module, you can use the following method:

- Add the first keyframe to a property of your choice
- Scrub the Playhead to a different frame, add another keyframe and then change the value
- Repeat the same process explained above for the third keyframe.
- Select the second keyframe, go to the Interpolation dropdown menu, and select the EaseIn
- Select the third keyframe, go to the Interpolation dropdown menu, and select the EaseOut
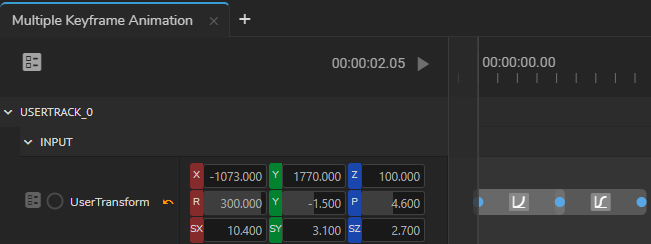
The image above shows an example of an animation with multiple keyframes and EaseIn & EaseOut interpolations. See Interpolations