Logical Channels using Aliases
Aliases enable you to send graphics to multiple engines simultaneously without losing the ability to control those engines separately. You can use the pipe symbol (|) to combine channel names, such as Engine 01|Engine 02, to create a logical channel that routes to multiple destinations. You can use aliases for engine grouping as well as for multi-camera scenarios.
In such a scenario:
- Rundown items assigned to Engine 01 will be rendered only on the Engine 01.
- Rundown items assigned to Engine 02 will be rendered only on the Engine 02.
- Items assigned to Engine 01|Engine 02 will render on Engine 3.
Use Case Example
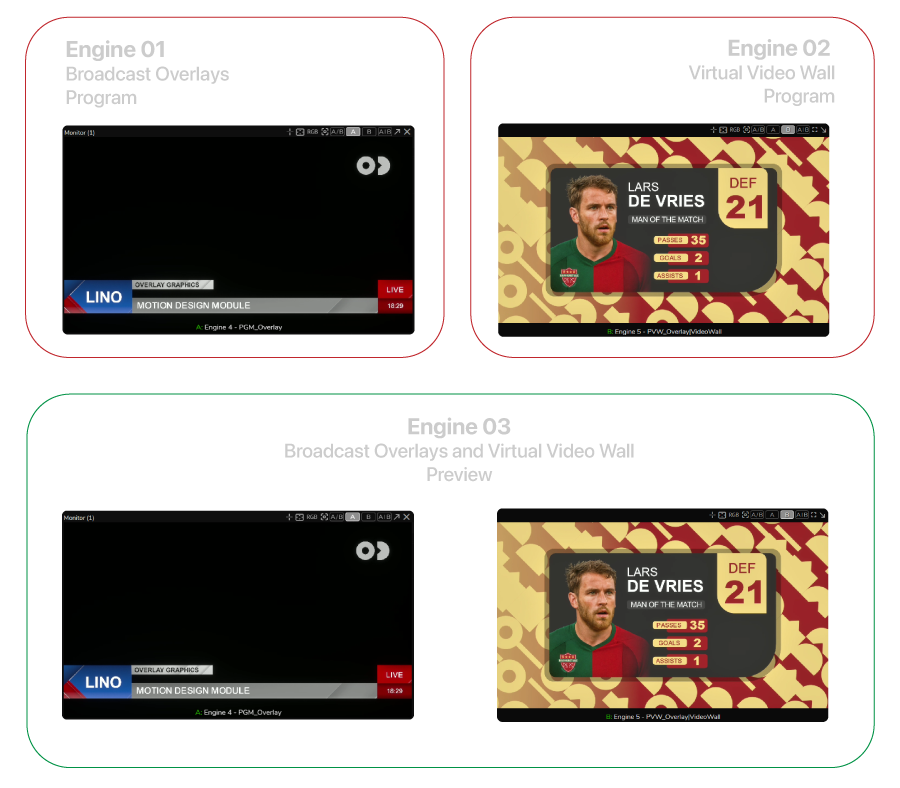
In this example, we will cover the topic of Aliases with a three-engine scenario: the first engine renders broadcast overlay graphics, the second engine renders virtual video wall graphics (full-screen graphics created in Unreal Engine Motion Design), and the third engine serves as the preview engine, as shown above. Our goal is to control all graphics types, including their preview, within the Lino playout. For this setup, we use OnAirMSAA from Reality Editor Projects.
The Overlays and Video Wall engines will be program engines, and the third engine will be the preview engine. All engines will host the same project that contains video wall graphics and broadcast overlay graphics. This setup is based on Dynamic Channels. For more details, please read the Channel Types section.
Preparing Launch

- Navigate to the Launcher module and click Create Show.
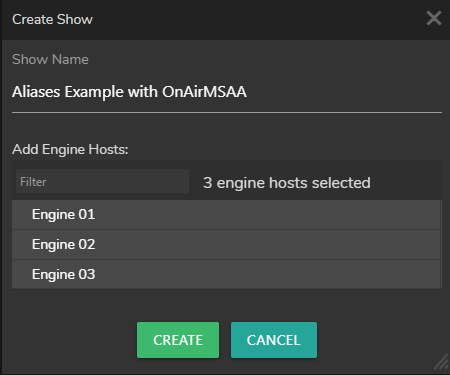
- Select your engines, enter a Show name, and click Create.
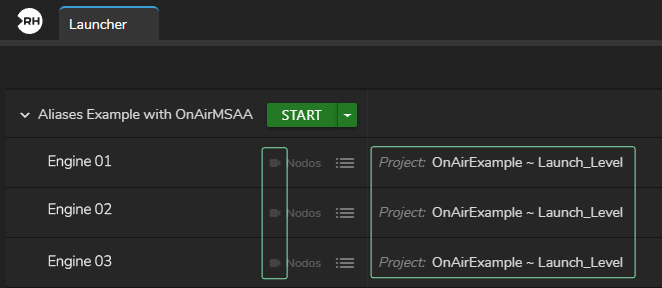
- Disable Nodos channels for each engine by clicking the Nodos Channel Badges (red camera icon), select your Project, and click Start to launch your Show.

- Check the Engine Status Toolbar and verify that all projects are loaded and all connections are established successfully.
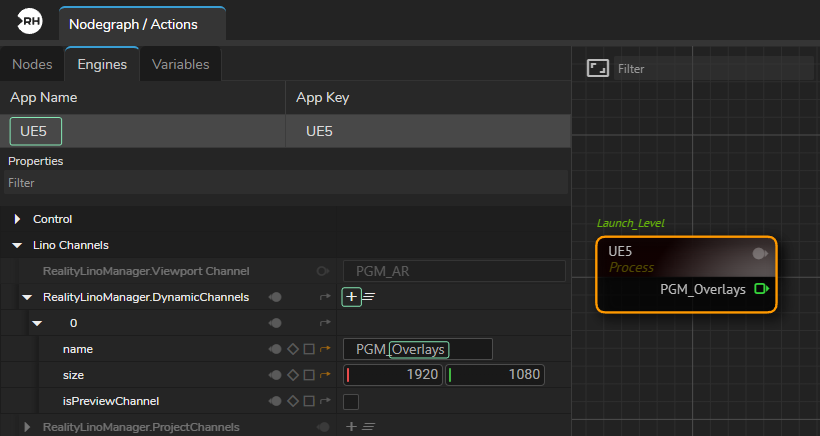
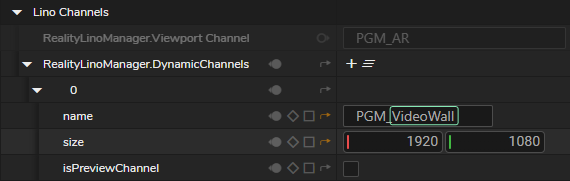
- Switch to the Nodegraph, click Engine 01 in the Engine Status Toolbar, drag and drop the UE5 process node to the nodegraph canvas, and select it. Then, click the Engine tab, select UE5, navigate to Properties, and click the Create Dynamic Channel button (+ icon). Change the Name property to Overlays, as shown above.
You will notice that the prefix (PGM_) does not change even if you select the whole Name (PGM_Channel1) and replace it with only Overlays, it will be PGM_Overlays. This occurs because these prefixes are used by Reality Lino Manager to distinguish and manage channels.
- Using the same method, create a dynamic channel on Engine 02 and rename the channel to VideoWall.
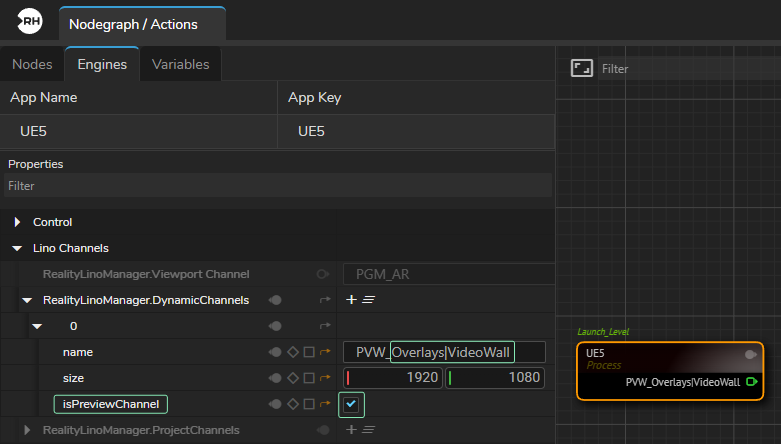
- Using the same method described above, create a new Dynamic Channel, but this time enable the isPreviewChannel property and rename the channel to Overlays|VideoWall using the pipe (|) symbol.
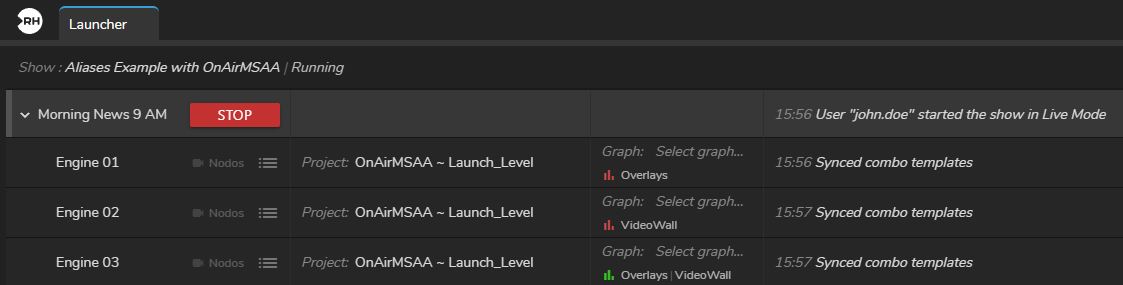
- Switch to the Launcher module and check the channel information. As the image above shows, Overlays and VideoWall channels are displayed with red bar icons, which indicates that we have created two Program channels with Dynamic channel type. The Overlays|VideoWall alias is displayed with a green bar icon, which indicates that it is a Preview Channel and its type is also Dynamic.
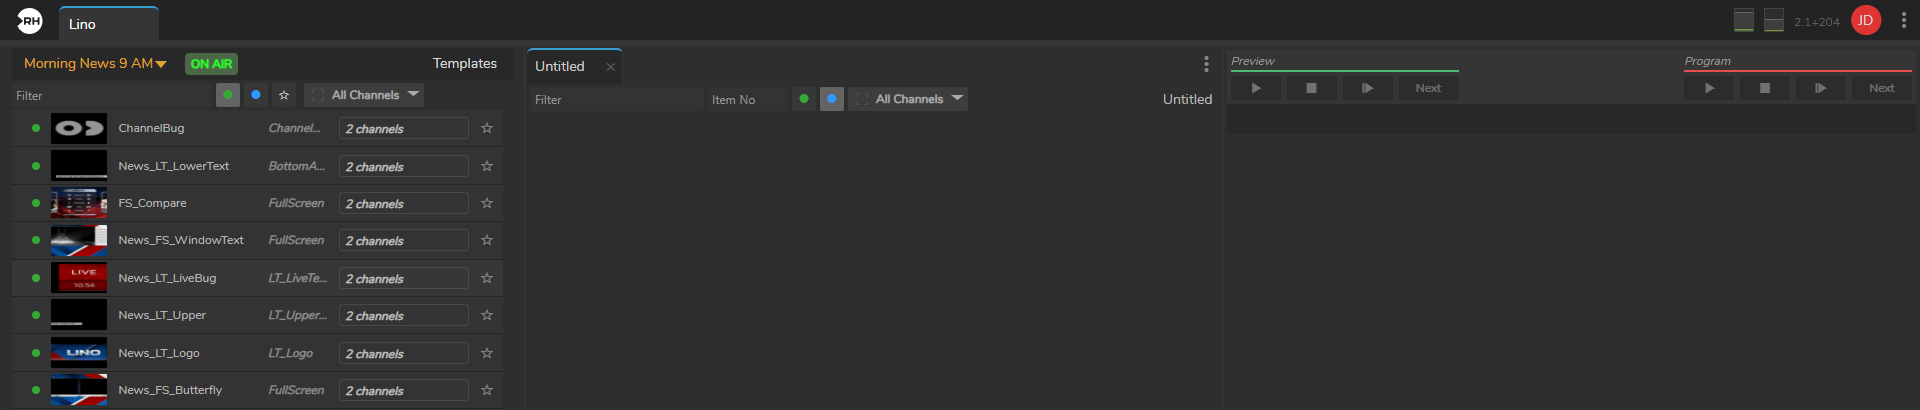
- Switch to the Lino playout module and click Show All Motion Design Templates.
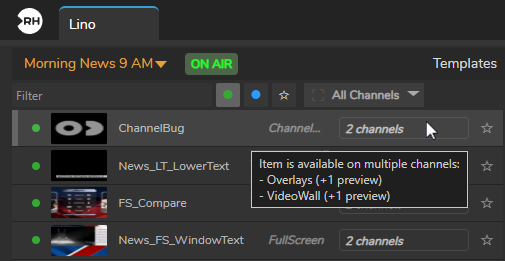
- Hover your mouse over the channel name. As the image above shows, the selected template (ChannelBug) is available on both the Overlays channel and the VideoWall channel. Both channels indicate +1 preview for each. The +1 preview in our setup indicates the alias. Whether you preview Overlays graphics or VideoWall graphics, their preview will be rendered by Engine 3 through the Overlays|VideoWall channel.
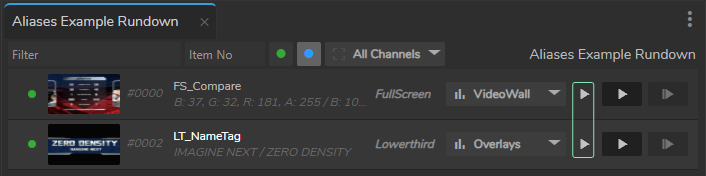
- Create a new Rundown through the Rundown menu, drag and drop one template from VideoWall and one from Overlays. As the image above shows, the previewing function is now enabled for both VideoWall and Overlays channels.
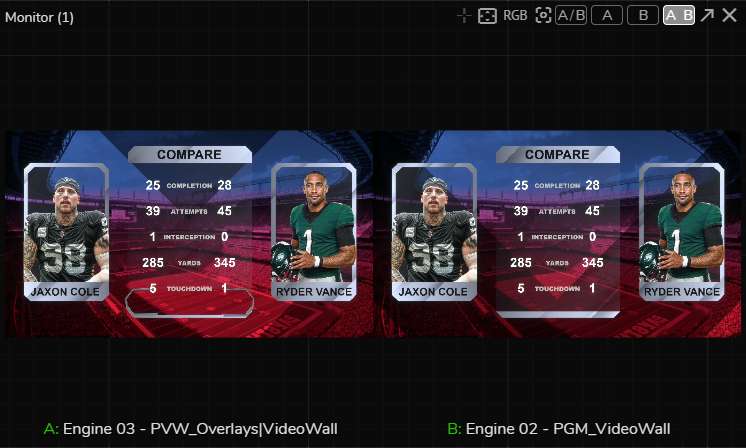
- Activate the APM (Advanced Preview Monitor) on Engine 3's PVW_Overlays|VideoWall output pin on the APM's Channel A and do the same for Engine 2's PGM_VideoWall output pin. Click the A|B: Multiview button on the Advanced Preview Monitor. Now switch to the Lino playout, click the Preview In button of your VideoWall rundown item (in our case, FS_Compare), and then click the Program In button of the same template. As the image above illustrates, we first previewed the item and then took it to program. Try experimenting with different rundown items such as LT_NameTag, etc.