Multi Camera and Multi Graphics Scenario
Before you begin, please note that the examples are based on the renewed Launcher and Lino modules.
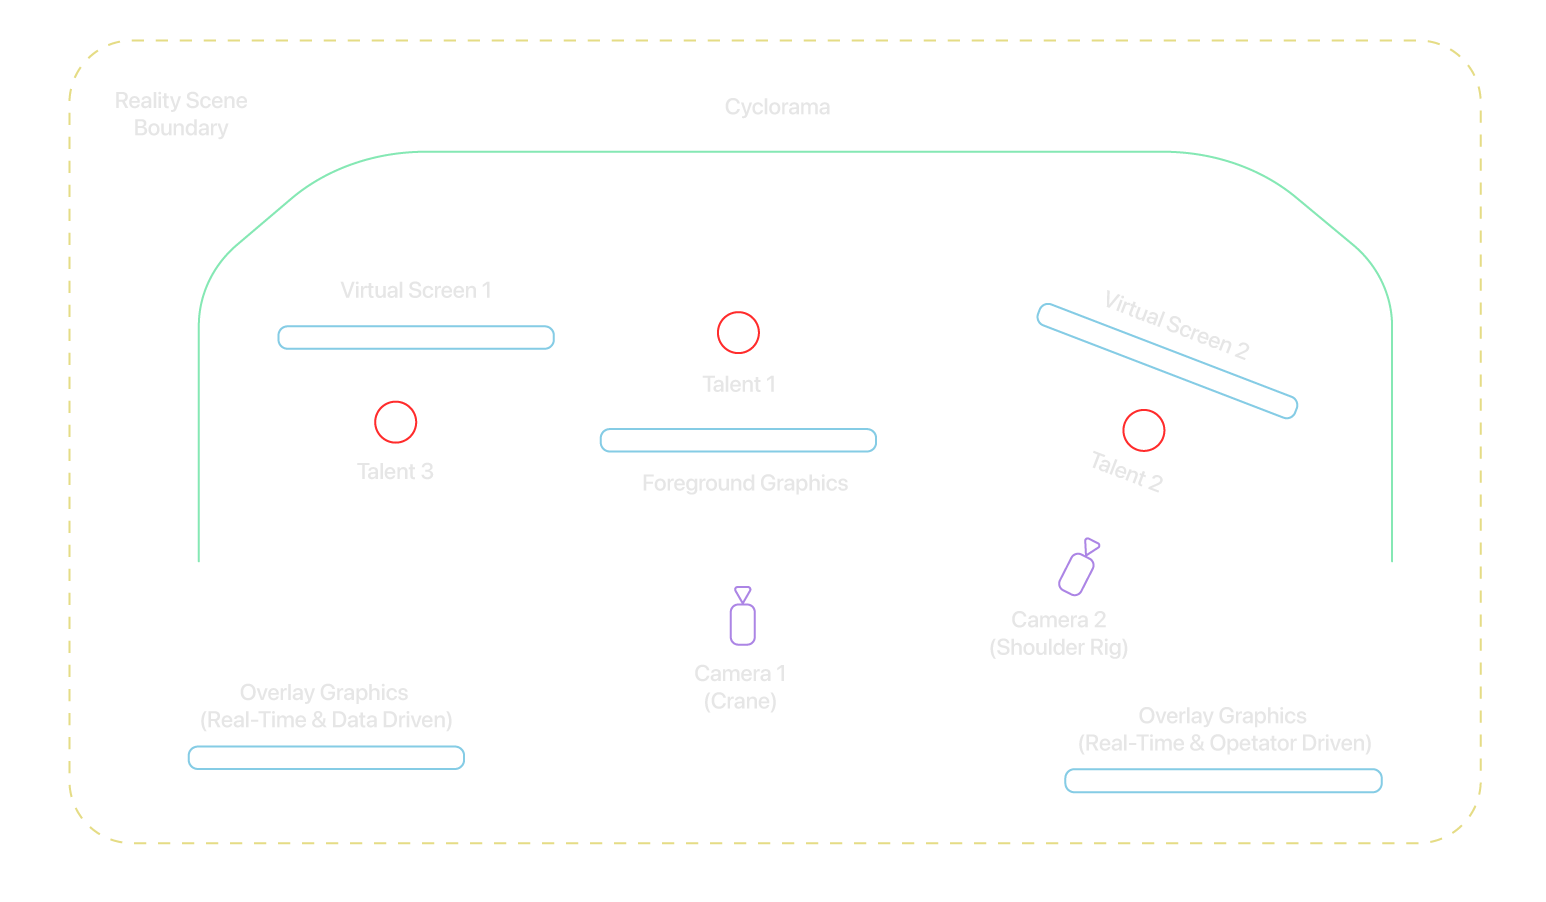
As illustrated in the diagram above, our example imagines a studio broadcasting important election results — including ballot counting, data visualization, and other relevant elements.
We’ve categorized our graphics into three types:
- Virtual Studio Graphics
- Overlay Graphics
- Virtual Screens
In our scenario, two broadcast cameras are used — one operated via a crane and the other with a shoulder rig.
- 2 engines are assigned to render Overlay Graphics.
- 2 engines are assigned to render and composite Virtual Studio Graphics, including foreground elements.
- 2 engines are assigned to render graphics on Virtual Screens.
To configure such a setup, understanding the concepts of Channels and Shows is essential. With the new Launcher concept, you must first navigate to the Configuration module to create a Channel. The process of creating Shows takes place within the Launcher module.
Although not strictly required, it is highly recommended — and considered best practice — to define Channels based on graphic types. This is because you'll control and transmit your graphics through these Channels. In other words, Channels are the medium for routing your graphics into the desired pipeline. Once Channels are defined, you can create a Shows and ultimately manage your broadcasting operation via Lino Rundown.
Configuration
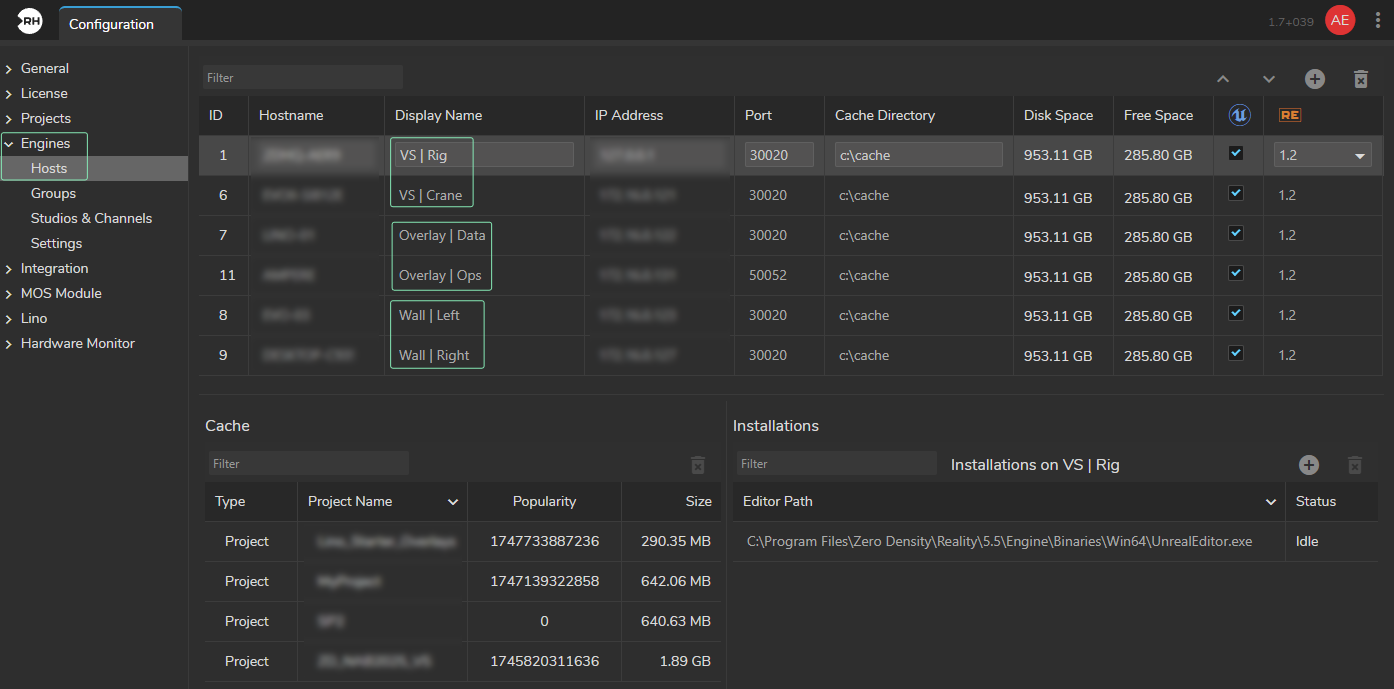
Since our scenario requires six engines, it's best practice to assign them identifiable Display Names, as demonstrated in the image above.
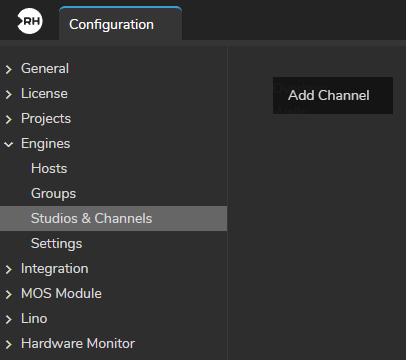
- Select Studios & Channels configuration.
- Navigate to the Details Panel.
- Right-click on an empty space and choose Add Channel from the context menu.
In the pop-up menu, enter a name for your Channel and click OK. As a best practice, assign names similar to the engine Display Names.
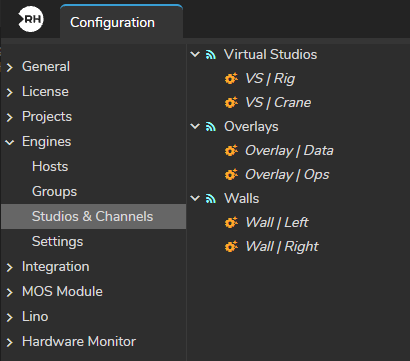
After adding all Channels, your Studios and Channels configuration should resemble the structure shown in the image above.
Launcher
- Activate the Launcher module via Main Menu > Modules > Launcher.

- Right-click, and choose Add Show.
- Enter a name for the Show and click OK.
You can add multiple Shows, depending on system capabilities.
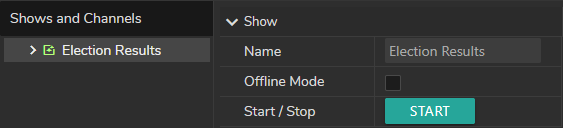
Your Launcher Details Panel should now reflect the newly added Show.
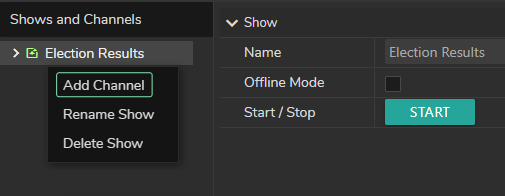
- Right-click the created Show (in our example, Election Results) and select Add Channel from the context menu.
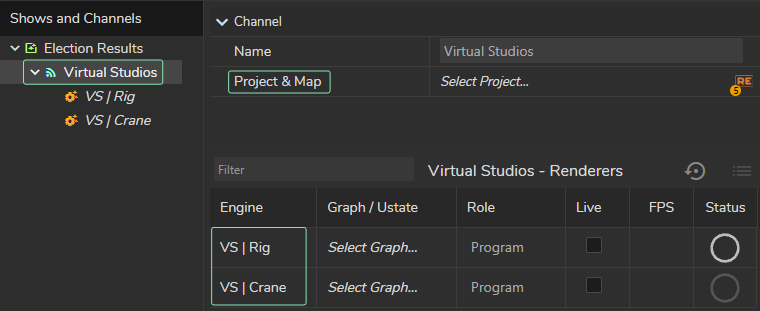
- Choose the Channels you want to include from the Add Channels to Show pop-up menu (In our example, this is the Virtual Studios channel).
- Select other Channels you’ve added to the Election Results Show.
You can now:
- Select a Project for the channel.
- Optional | Choose a GRaph. (You can launch a project without GRaph)
- Define the Engine Role. (Preview or Program)
- Optional | Enable or disable Live Mode.
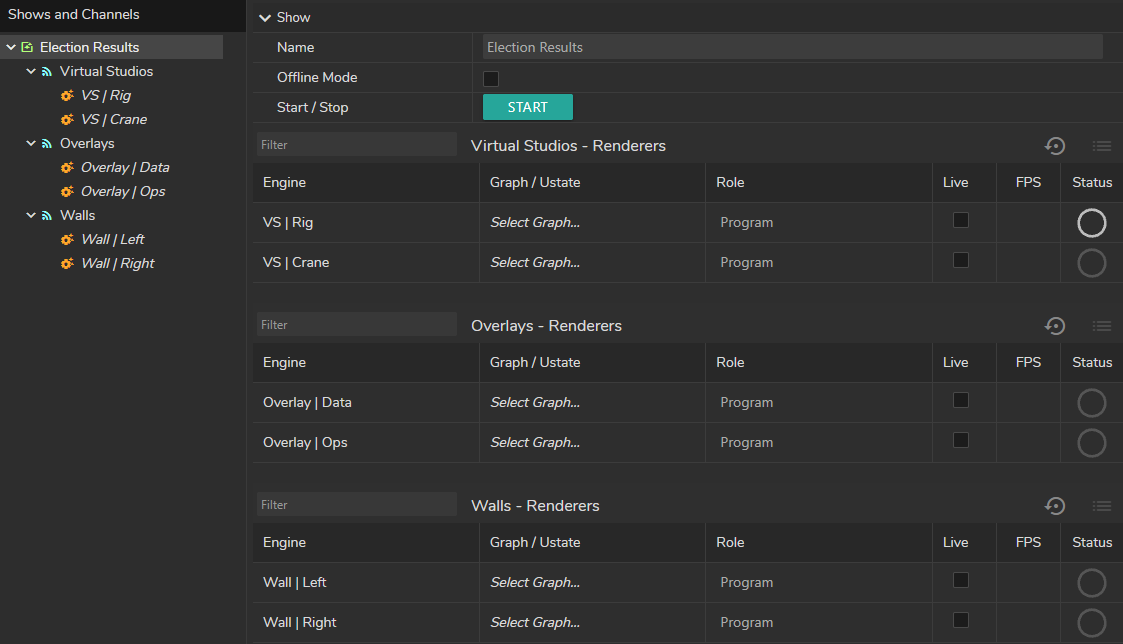
Your Show is fully configured and ready for launch, as shown above.
- Click the Start button to launch.