Automatic Lens Profiling
Objective
Create a Lens File that maps zoom and focus values to the optical parameters required by the virtual camera. For a tracked camera, the workflow can also determine camera alignment and fixed Center Shift.
Stage 1 — Open Autoprofiler
Open Lens → Autoprofiler or the equivalent release menu.
Confirm the Start checklist:
- Camera enabled;
- Live video;
- Live tracked camera body;
- Valid encoder;
- Safe zoom/focus values.
Stage 2 — Choose the Task
Select Profile a lens on a tracked camera for a new tracked-camera Lens File.
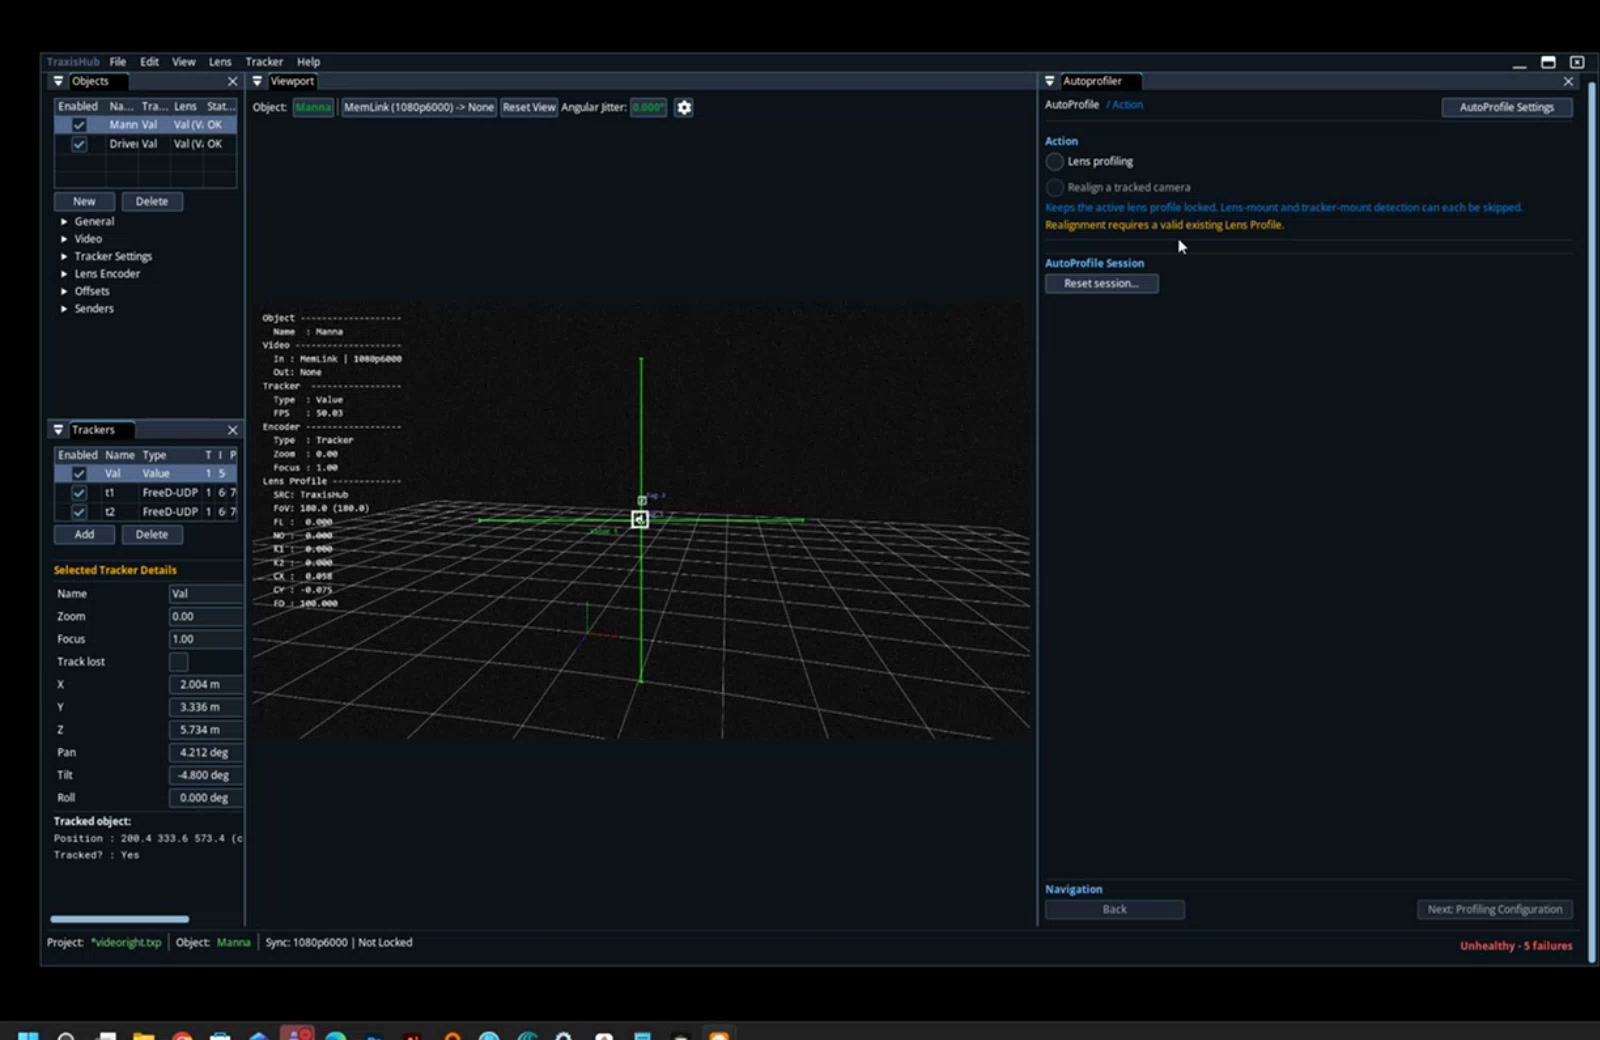
Do not choose Realign when the optical lens curve has never been created. Do not choose PTZ for a freely translated tracked camera.
Stage 3 — Configure the Lens
- Select Zoom lens or Prime/Fixed lens.
- For a zoom lens, select the zoom interval:
0.2for six nominal levels;0.1for eleven nominal levels and higher precision.
- Select the reference-marker method.
- Select Tag 1 and optionally Tag 2.
- Confirm that every readiness line is valid.
Reset the current lens calibration only when you intentionally want to discard the current profile state. On a tracked-camera profiling task, this can also clear tracked-camera alignment values.
Stage 4 — Configure Center Shift
Center Shift describes movement of the optical center relative to the image center.
| Mode | Use case |
|---|---|
| None | No measurable fixed or zoom-dependent shift |
| Mount offset | Fixed camera/lens mounting displacement |
| Zoom Mechanism | Optical center moves with zoom |
| Both | Fixed mounting displacement plus zoom-dependent movement |
Use the mode selected by the approved workflow. Do not choose a mode only to make the warning disappear.
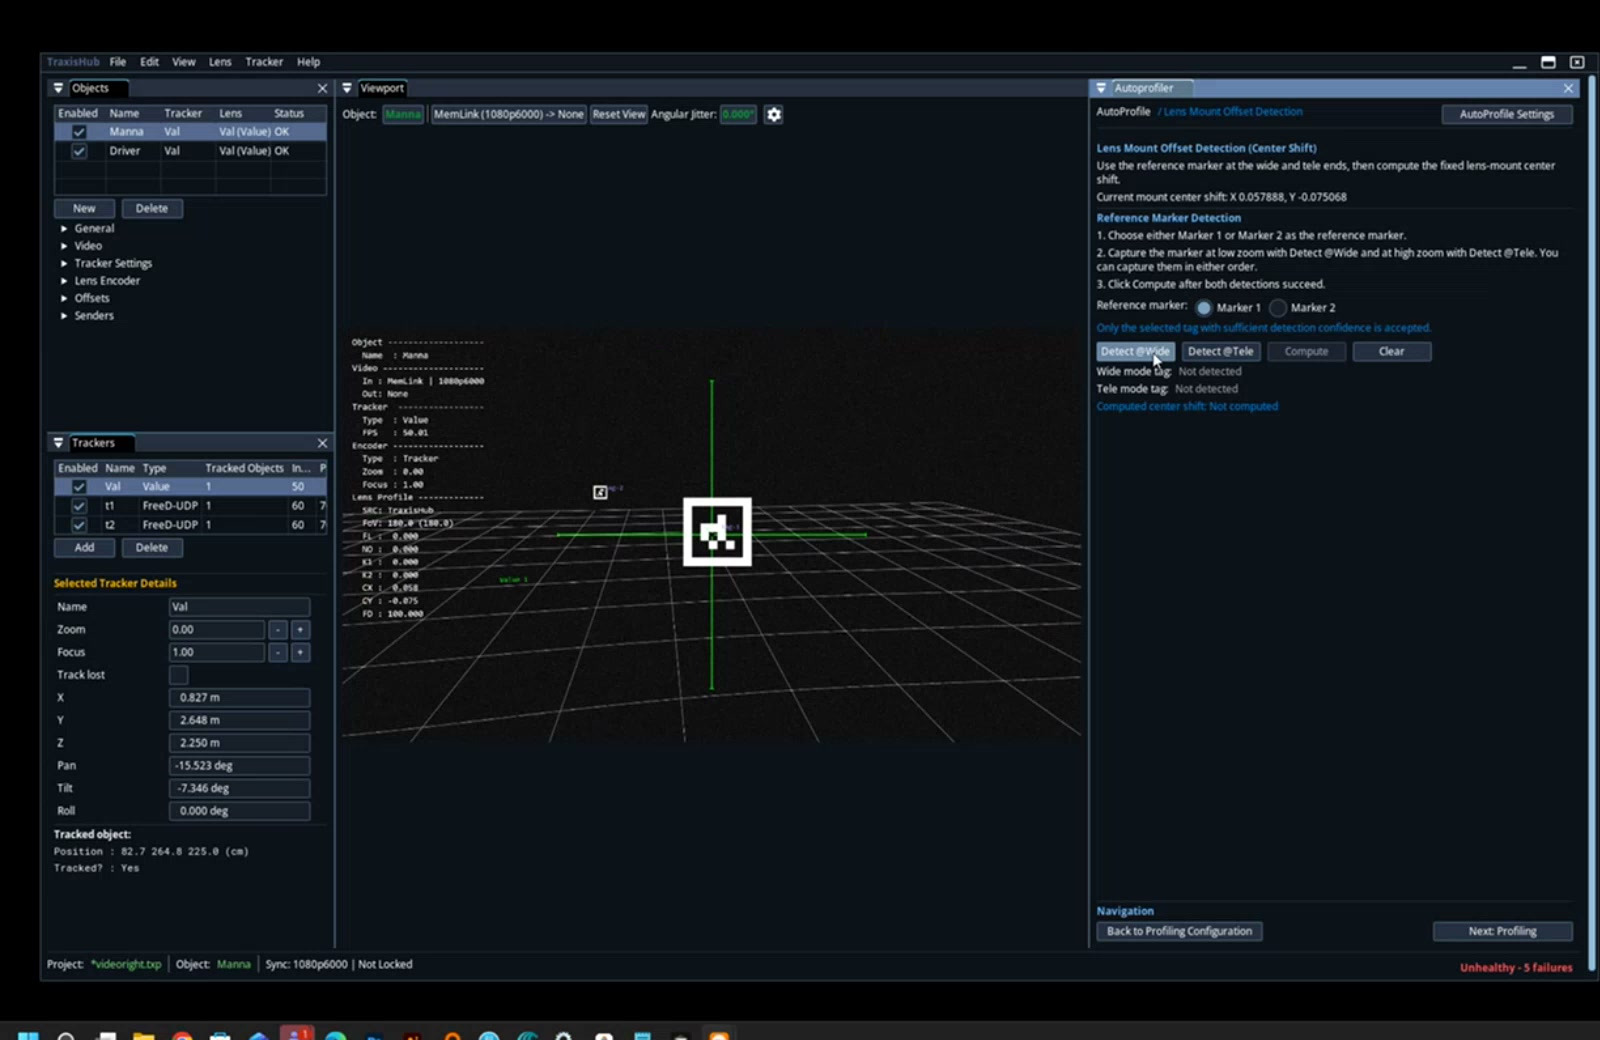
Detect at Wide
- Select one configured marker.
- Set physical zoom to full wide.
- Pan/tilt until the complete target is approximately centered.
- Select Detect @Wide.
- Confirm corner detection.
Detect at Tele and Compute
- Increase physical zoom while keeping the same target visible.
- Stop before the tag becomes clipped or too large for detection.
- Select Detect @Tele.
- Confirm corner detection.
- Select Compute.
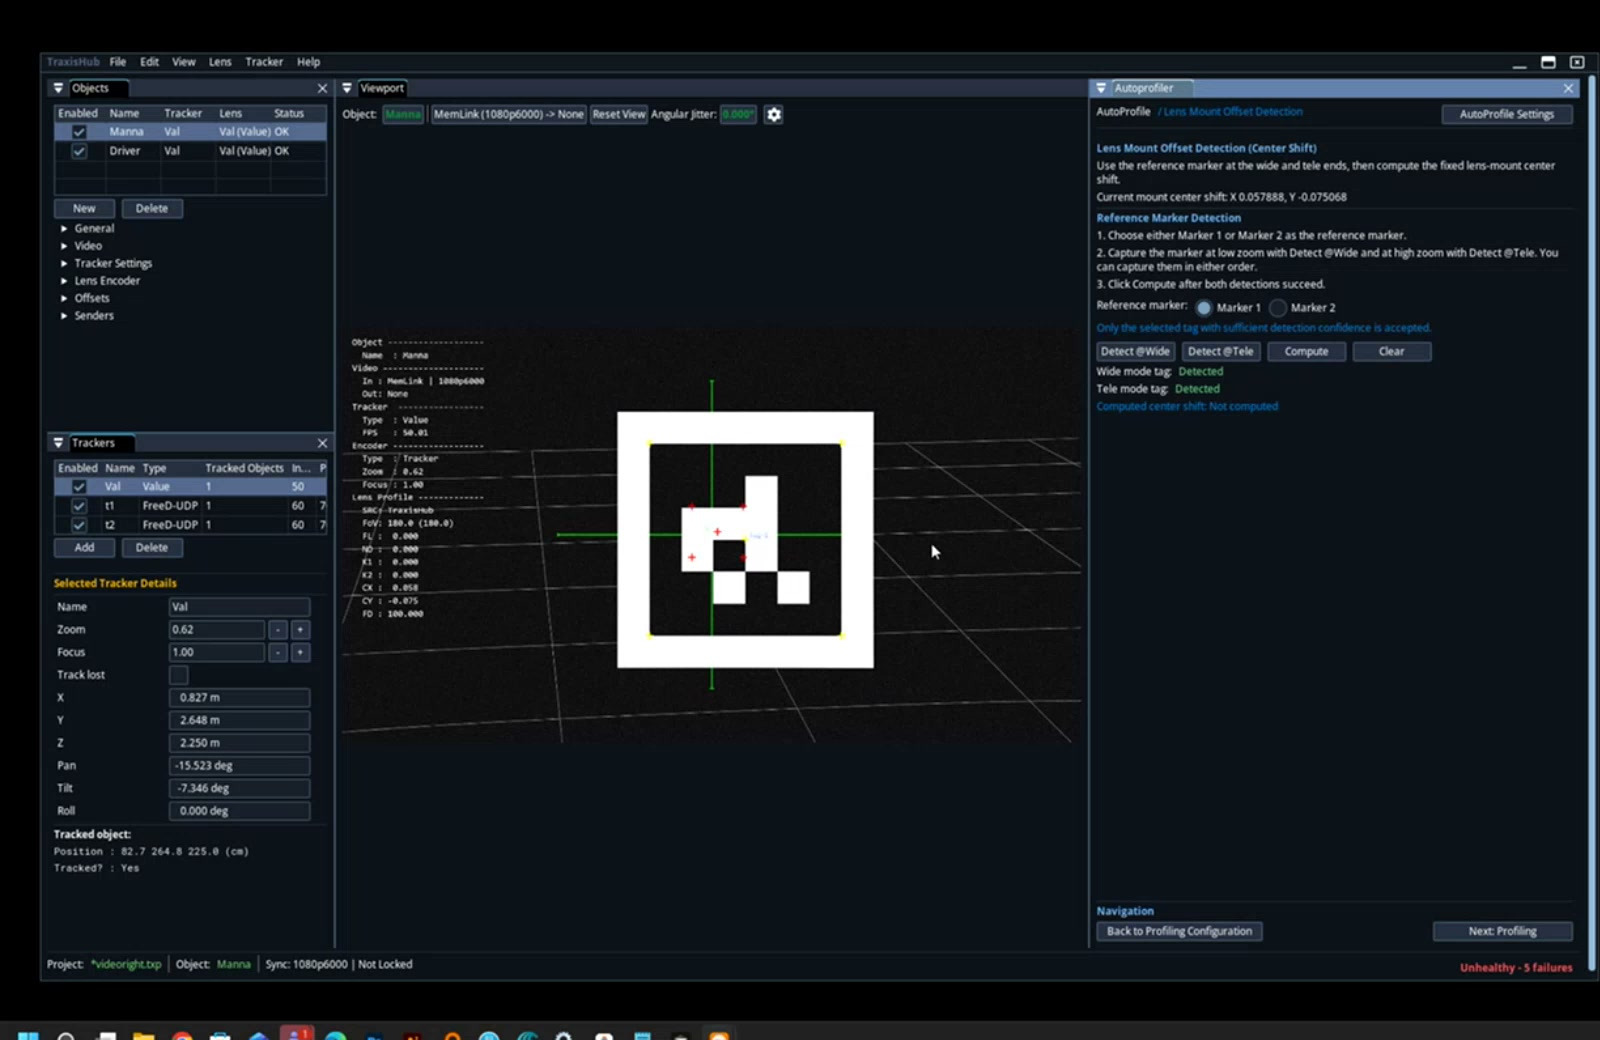
Wide and Tele captures are independent but must use the same video resolution. Return physical zoom to 0 before the profiling stage.
Stage 5 — Select the Wide Zoom Point
Select zoom 0.0. Move the physical lens until the encoder is inside the wizard tolerance. The stage controls may remain hidden while the encoder is outside the selected zoom point.
The wide point is the most important point. It establishes the initial optical solution and, for tracked cameras, the camera-owned alignment that the task permits.
Stage 6 — Capture Samples
Move the camera or change pan/tilt so the target appears in different frame areas. Stop and wait for stable capture after every movement.
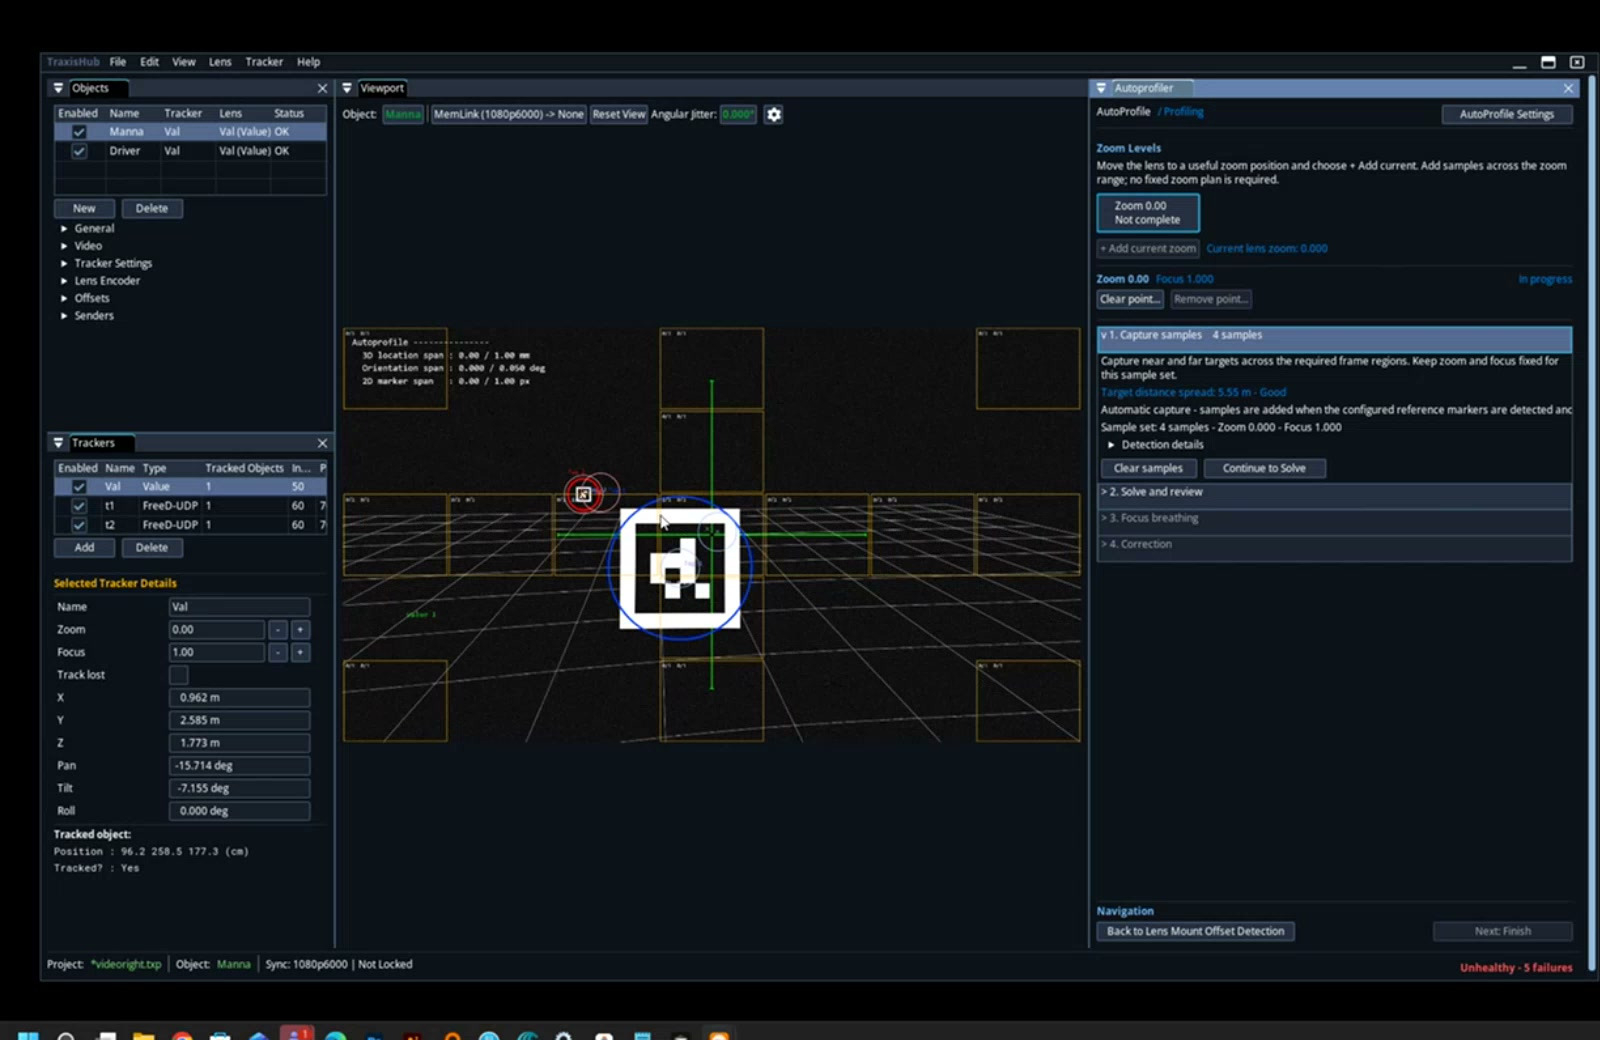
Capture:
- center samples;
- left and right samples;
- upper and lower samples;
- corner samples;
- near and far target observations when Nodal Offset is required.
Coverage is more important than a large count. Many samples from one small area do not constrain the lens correctly.
Every sample stores the 2D detection, 3D target position, tracked camera pose, zoom, and focus. Do not mix physical zoom levels in one sample set.
Stage 7 — Solve
Select Automatic unless an expert has a specific reason to control parameters manually.
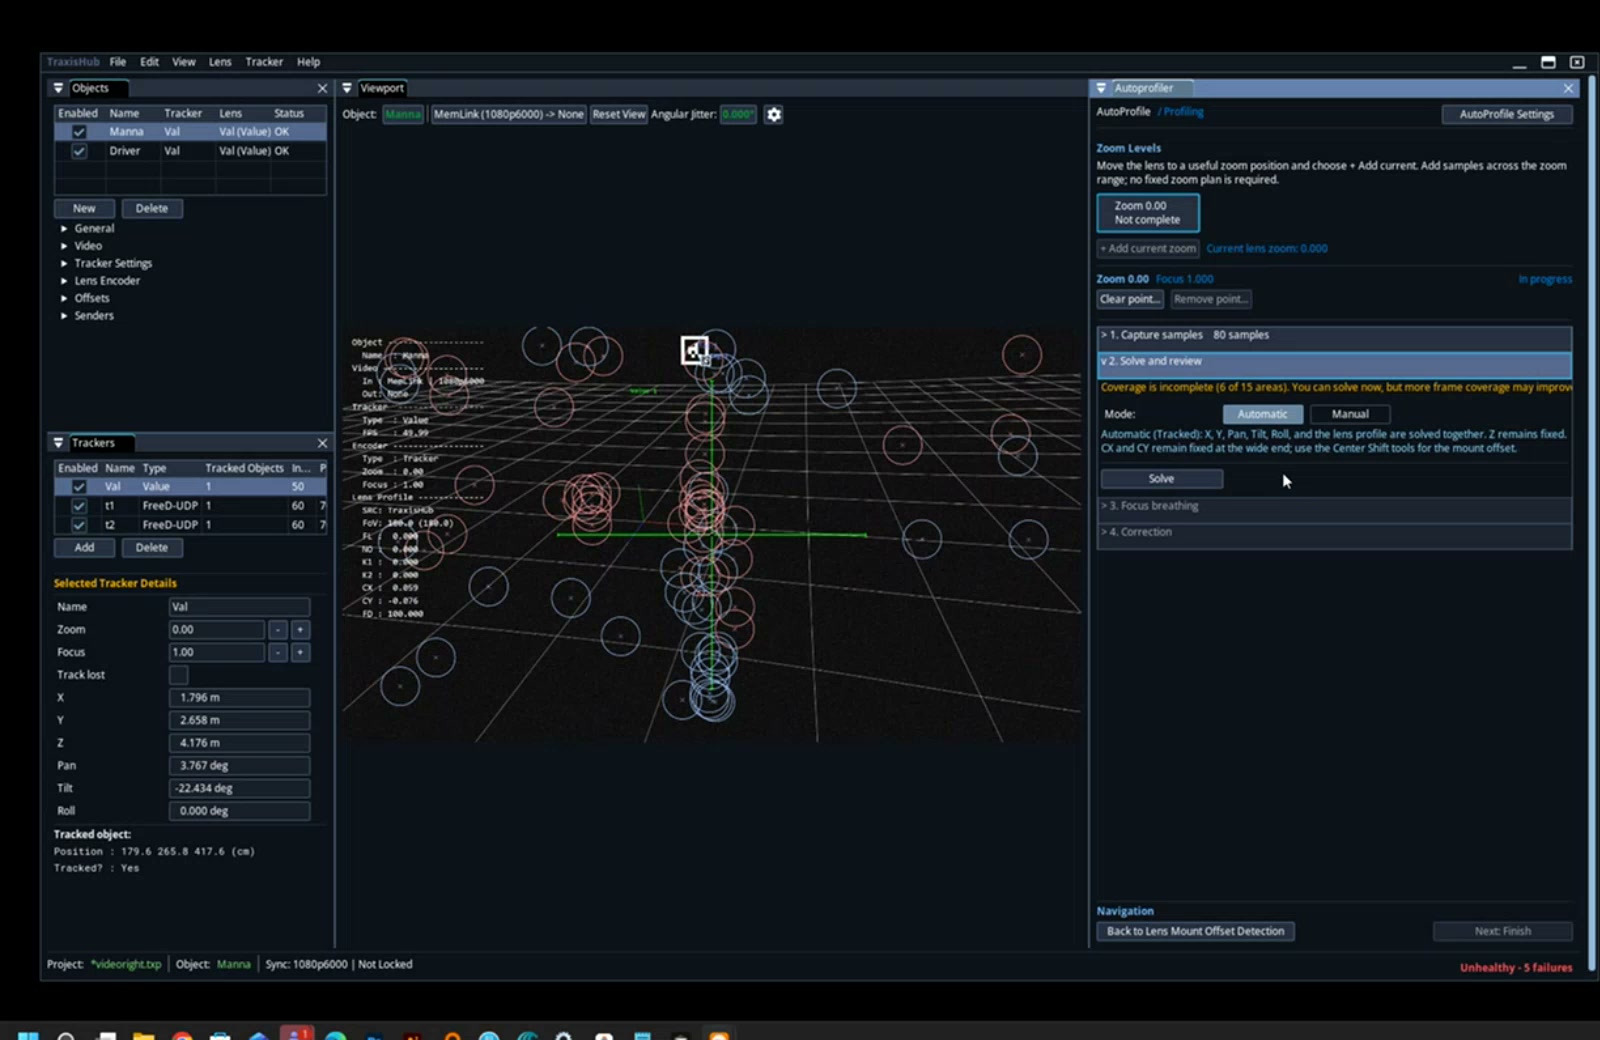
- Confirm that at least one valid sample is enabled.
- Select Solve.
- Approve overwrite only if the current task is intended to replace stored values.
- Wait for the quality and projection-error result.
- Continue to detailed review before accepting.
For tracked-camera profiling, the wide solve can determine applicable camera offsets. Implementation guidance keeps Z fixed and solves the permitted X/Y and orientation components. At higher zoom points, the task solves optical curves rather than redefining the physical camera mount.
Stage 8 — Review and Accept
Inspect minimum, maximum, and mean projection error. Magnify the viewport digitally and compare the observed target center with the projected 3D point.
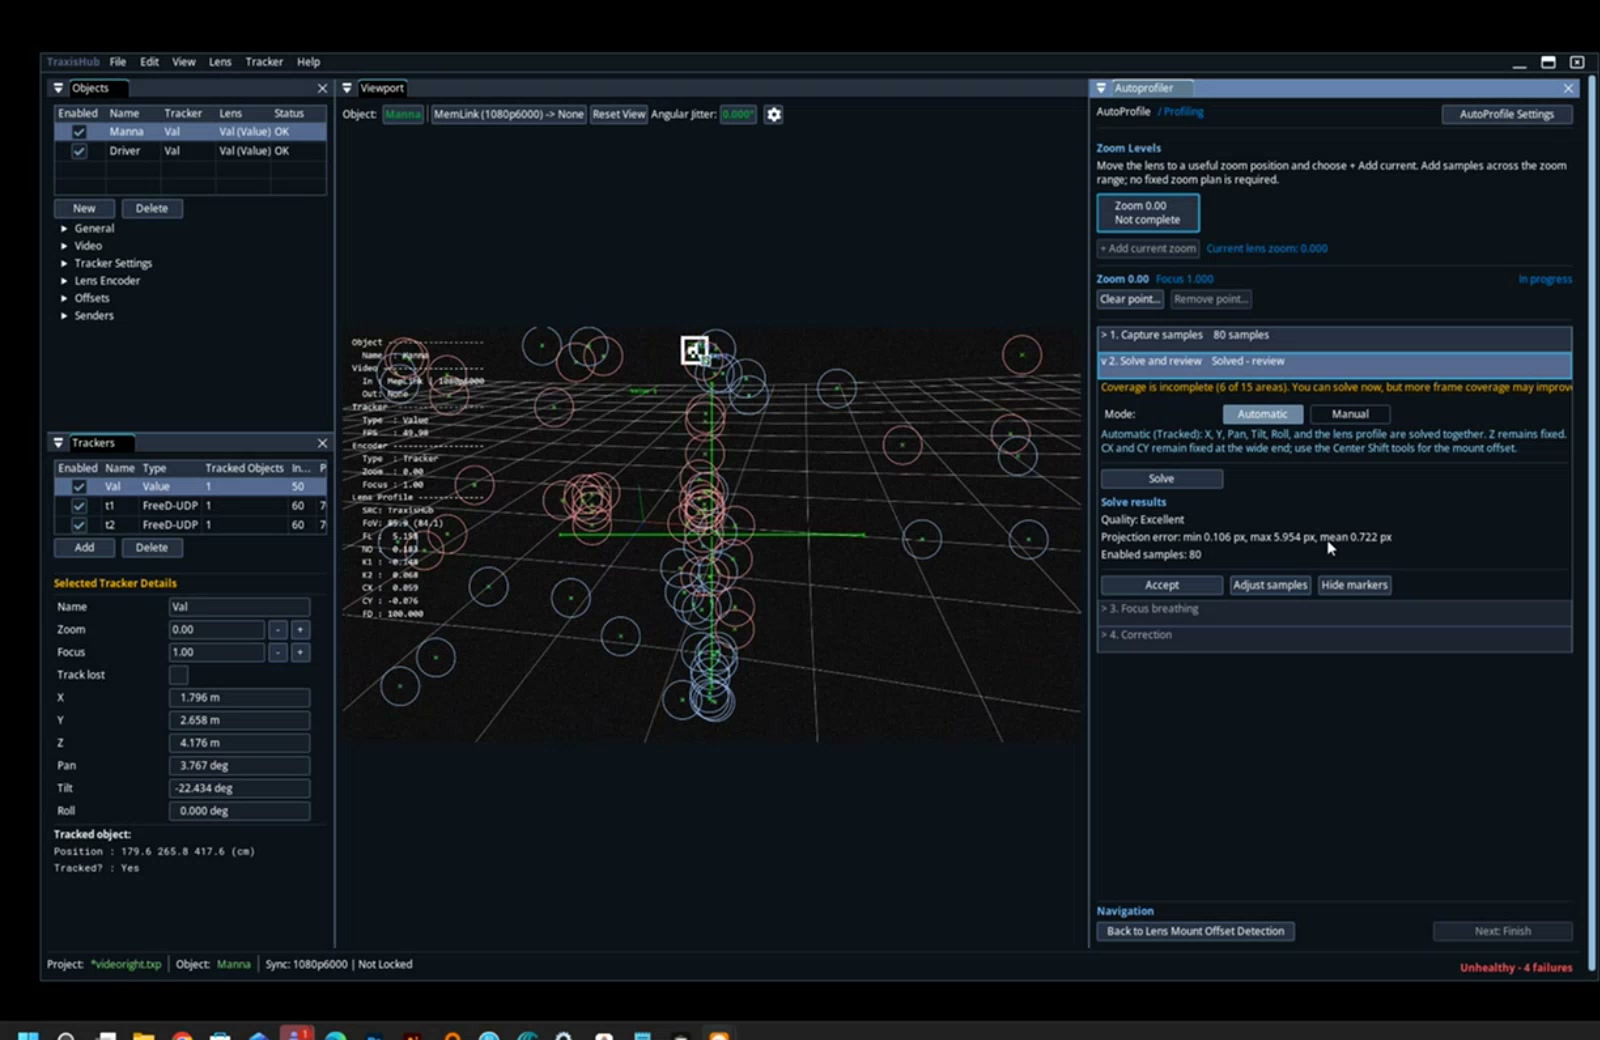
If one sample is much worse than the others, use Adjust Samples, disable only the confirmed outlier, and re-solve. Do not delete difficult edge samples merely to make the average smaller.
Stage 9 — Check Focus Breathing
Place a target near an image edge. Change focus through the useful range. If the projected point moves relative to the target, select Yes, it changed, start adjustment, and align it using Fine/Medium/Coarse increments.
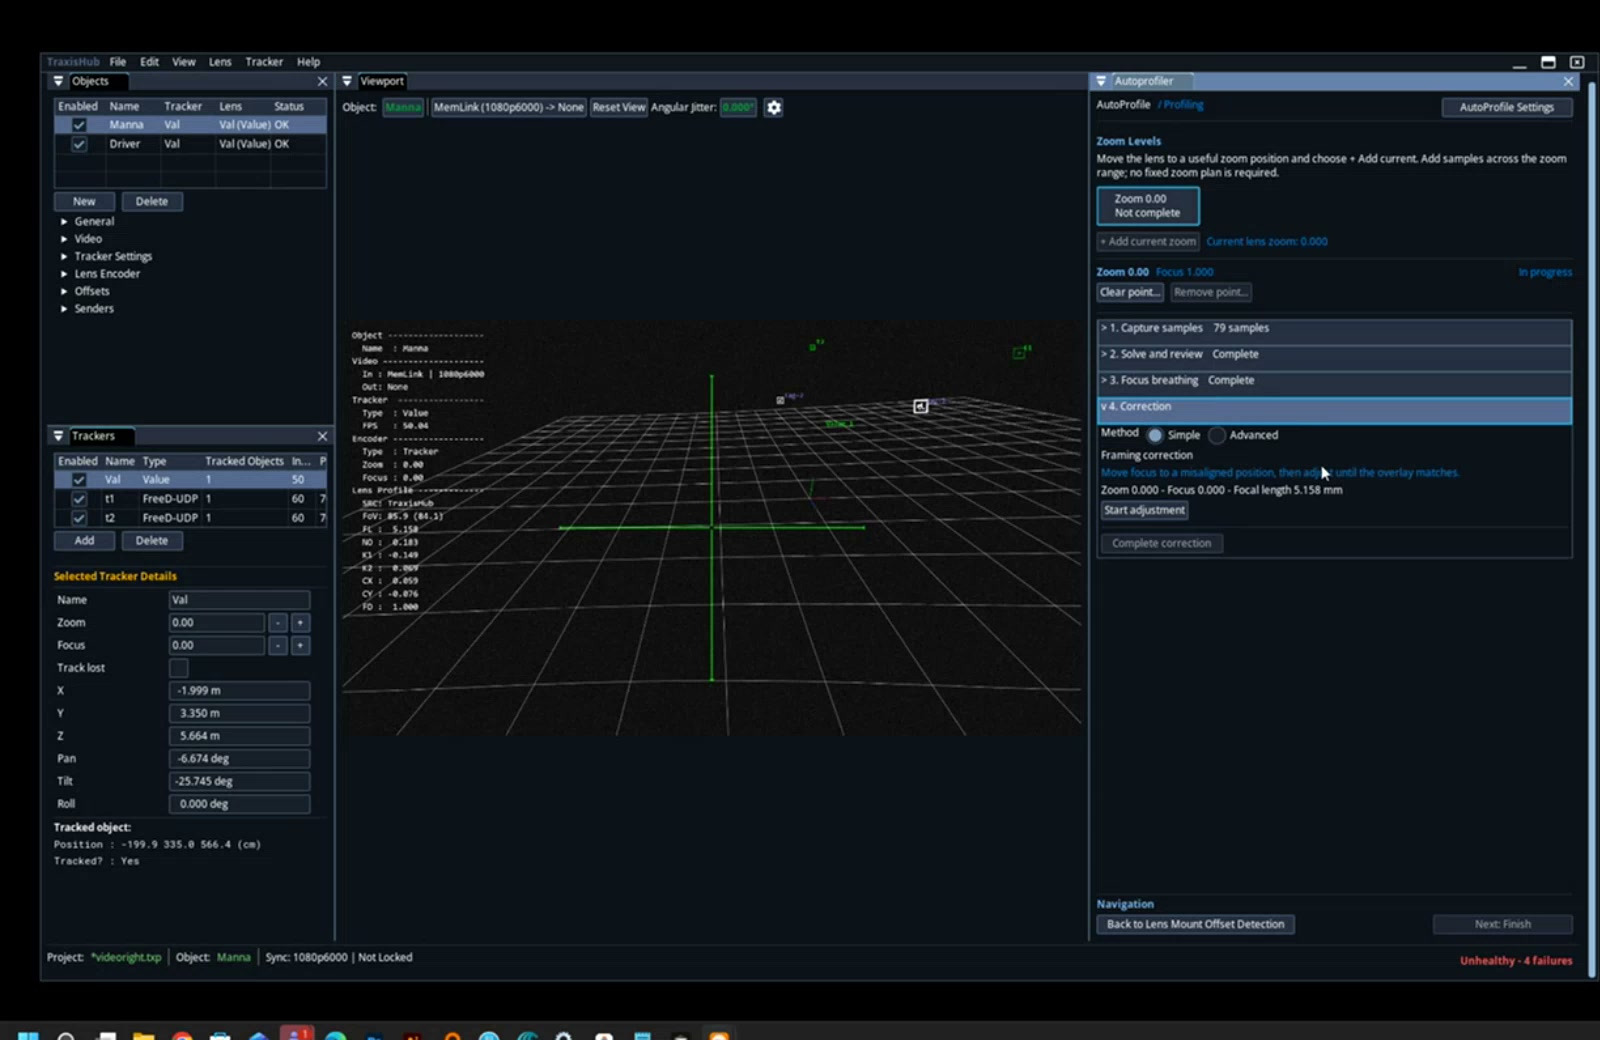
Rack focus again. Complete the correction only when the target remains aligned through the checked focus range.
Stage 10 — Repeat for Every Zoom Point
Move the physical lens to the next planned value and select/add that zoom level.
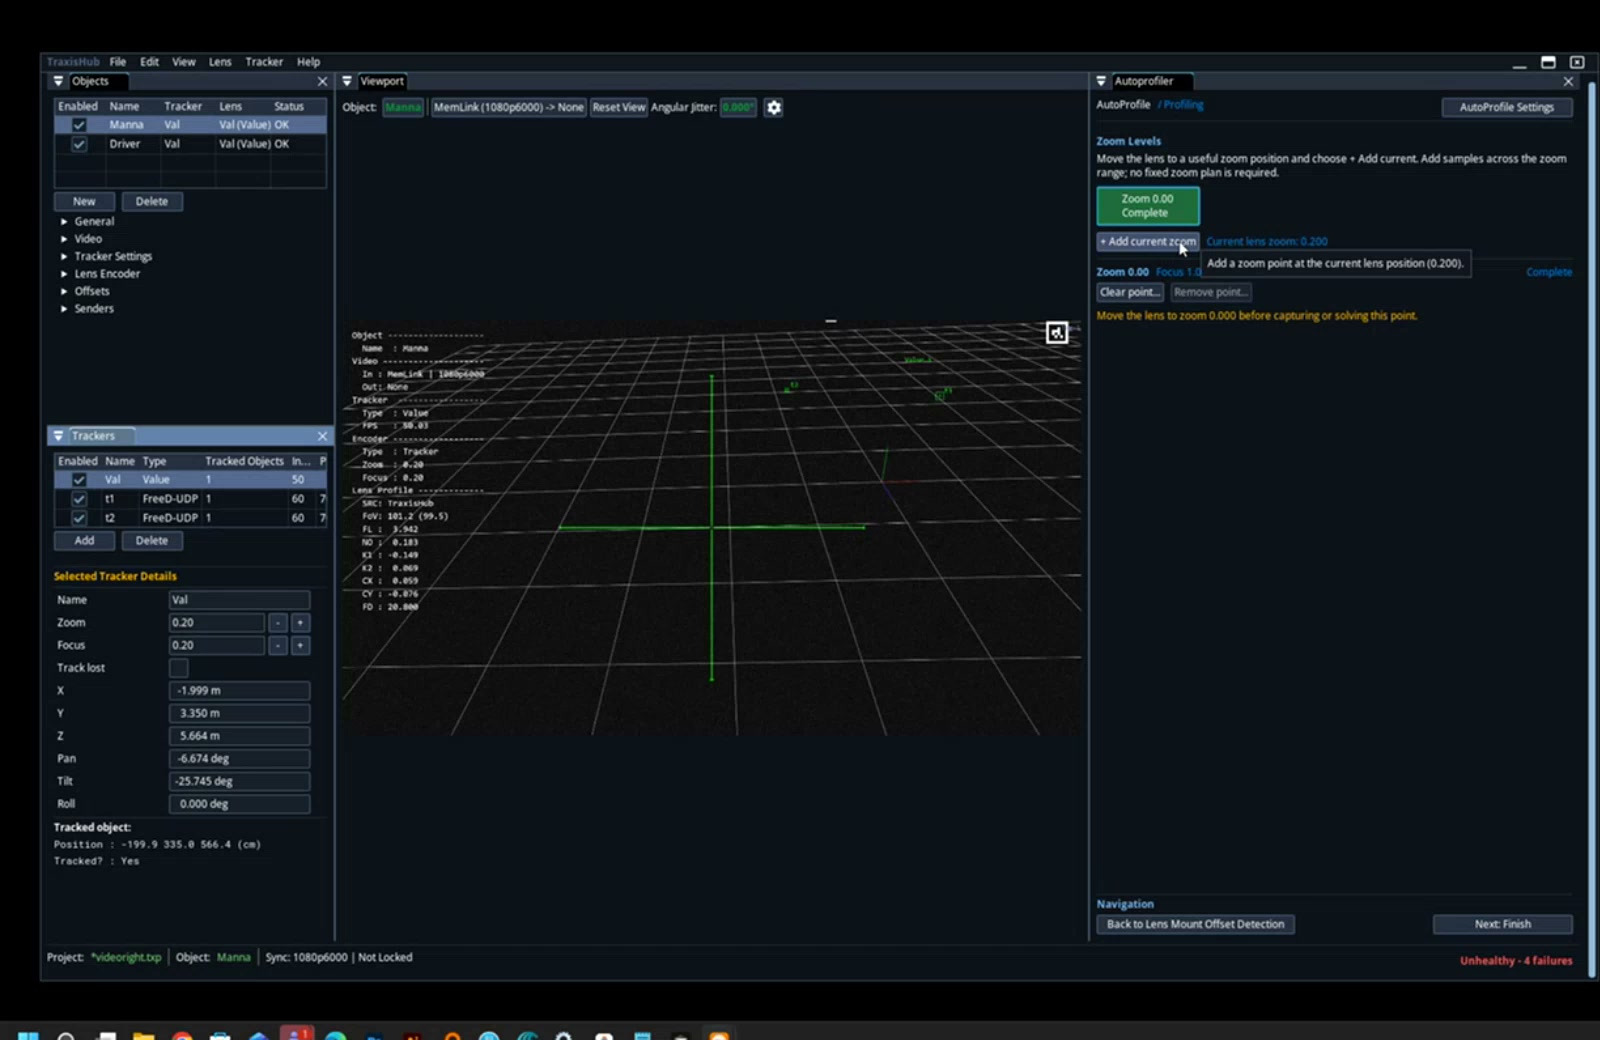
Repeat:
- Capture Samples.
- Solve.
- Review Results.
- Focus Breathing.
- Correction.
Do not mark the full lens complete when only one or two zoom points are solved.
Stage 11 — Finish and Reveal the Lens File
Finish only after every planned zoom point is complete.
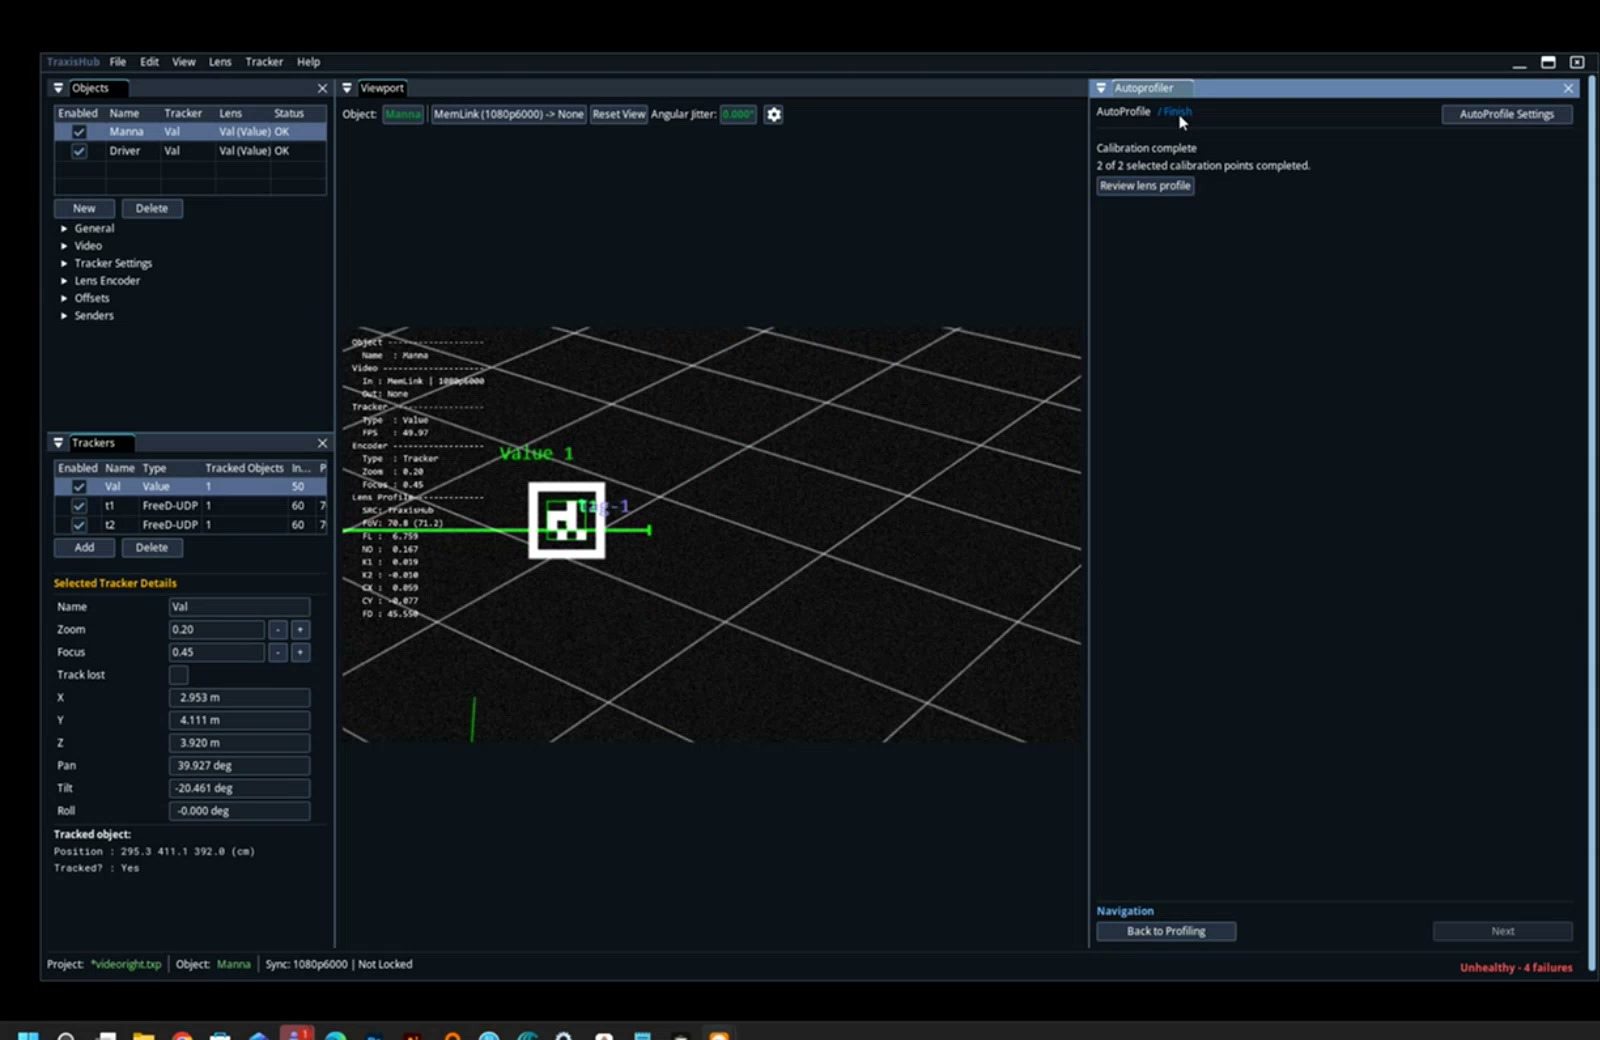
Review the generated curves, save the project, and export the Lens File according to the site delivery process. Record the camera, lens make/model/serial, encoder, zoom interval, target method, date, and operator.