Assign Fixed Anchor Markers
If cameras do not all see markers at the same time, set up anchor markers to improve updates. Anchors provide known reference points and help preserve the global origin during updates.
- Place the markers you want to use as anchors in the calibrated volume so the system can track them.
- Secure the markers firmly. Keep their positions and the distances between them unchanged during updates.
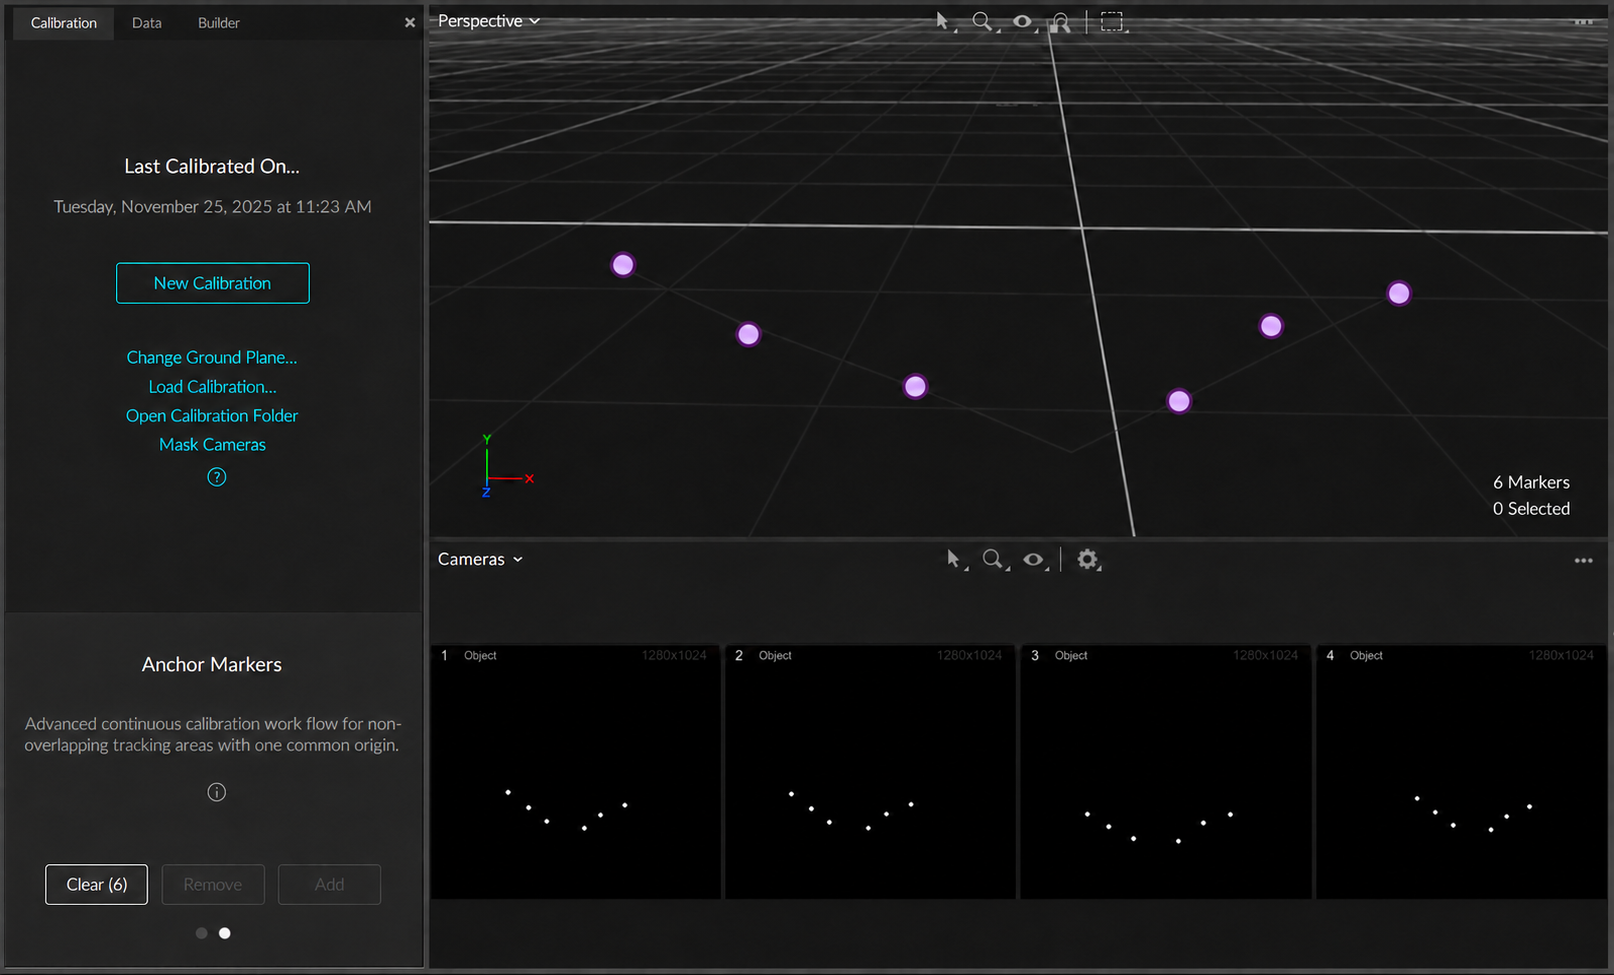
- Click the right dot at the bottom of the Calibration pane to open the Anchor Markers page.

- Select the intended markers in the 3D viewport.
- Click Add.
- Check for magenta spheres around the markers. These show that the anchors are assigned.
- Add more anchors as needed.
important
Do not move anchors during tracking. If a marker moves, clear the existing anchors and reassign them.
Active markers are preferred for anchors because their unique Active IDs reduce uncertainty when identifying markers, including after an occlusion. With either active or passive markers, each camera should see multiple markers spread across a large part of its field of view.